
This article covers how I’ve made my home smart locks more intelligent using Home automations, door sensors, shortcuts, and NFC tags. You’ll learn how to combine a door sensor with your lock using Apple Shortcuts and HomeKit automations to create a better auto lock delay mechanism that takes into account whether the door is opened or closed.
A few months ago, I replaced two exterior deadbolt locks in my house with the Schlage Encode Plus. In my opinion, it’s the lock to get if you are deep in the Apple and HomeKit ecosystems. It’s rekeyable, has a touchpad, and supports home keys in Apple Wallet. As I mentioned in my article on replacing my physical keys with digital equivalents, I no longer carry keys with me when I leave the house. I can unlock my doors using my Apple Watch, a key code, or my iPhone. I can also create temporary codes that I give to house guests and family members who need access to the house.
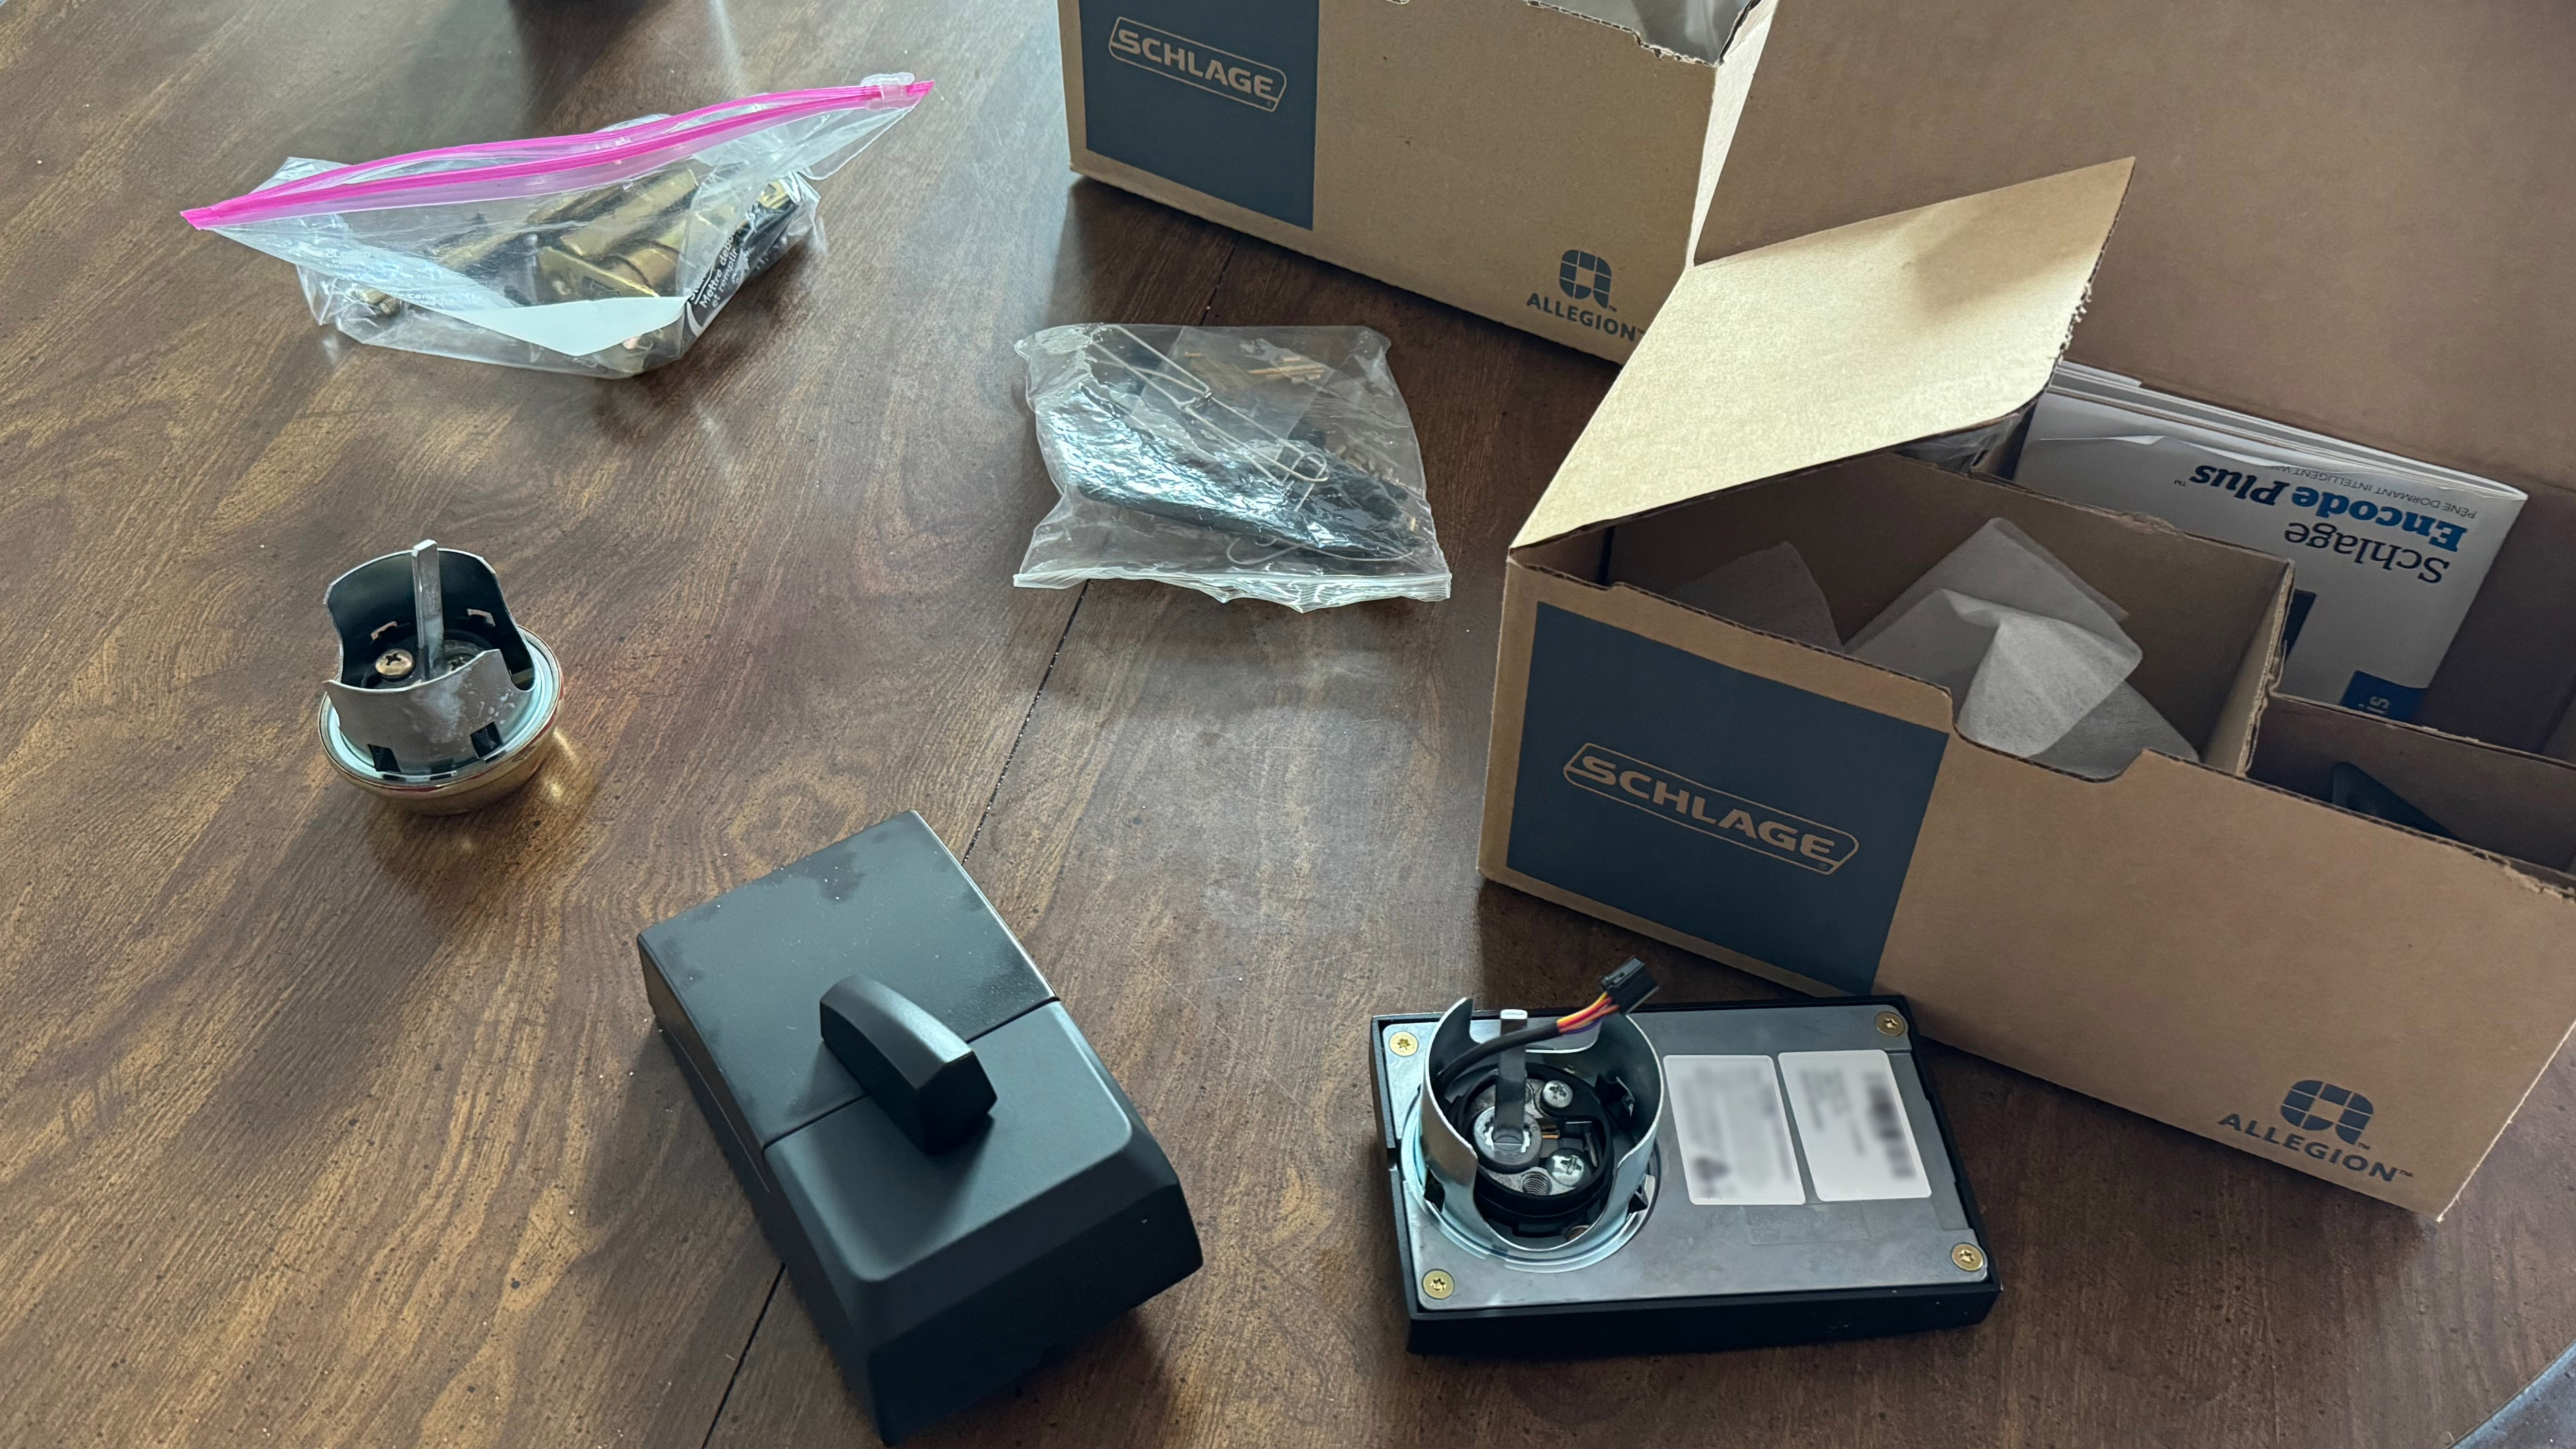
The Schlage Encode Plus locks are on the pricier side, but Amazon often has deals where it’s on sale at around 20% off (~$250/each). Make sure you get the Encode Plus model, as the Encode model does not support HomeKit.
Delaying the inevitable, or where it falls short
The Schlage Home app has an optional auto lock delay that can be set between 15 seconds to 5 minutes. A downside to this feature is that the lock does not have a sensor for detecting when the door is actually closed. This can be problem if the deadbolt automatically locks when the door is still open. If you don’t see this happen and try to close the door, you may be surprised by the loud bang sound as the deadbolt slams against the door frame.
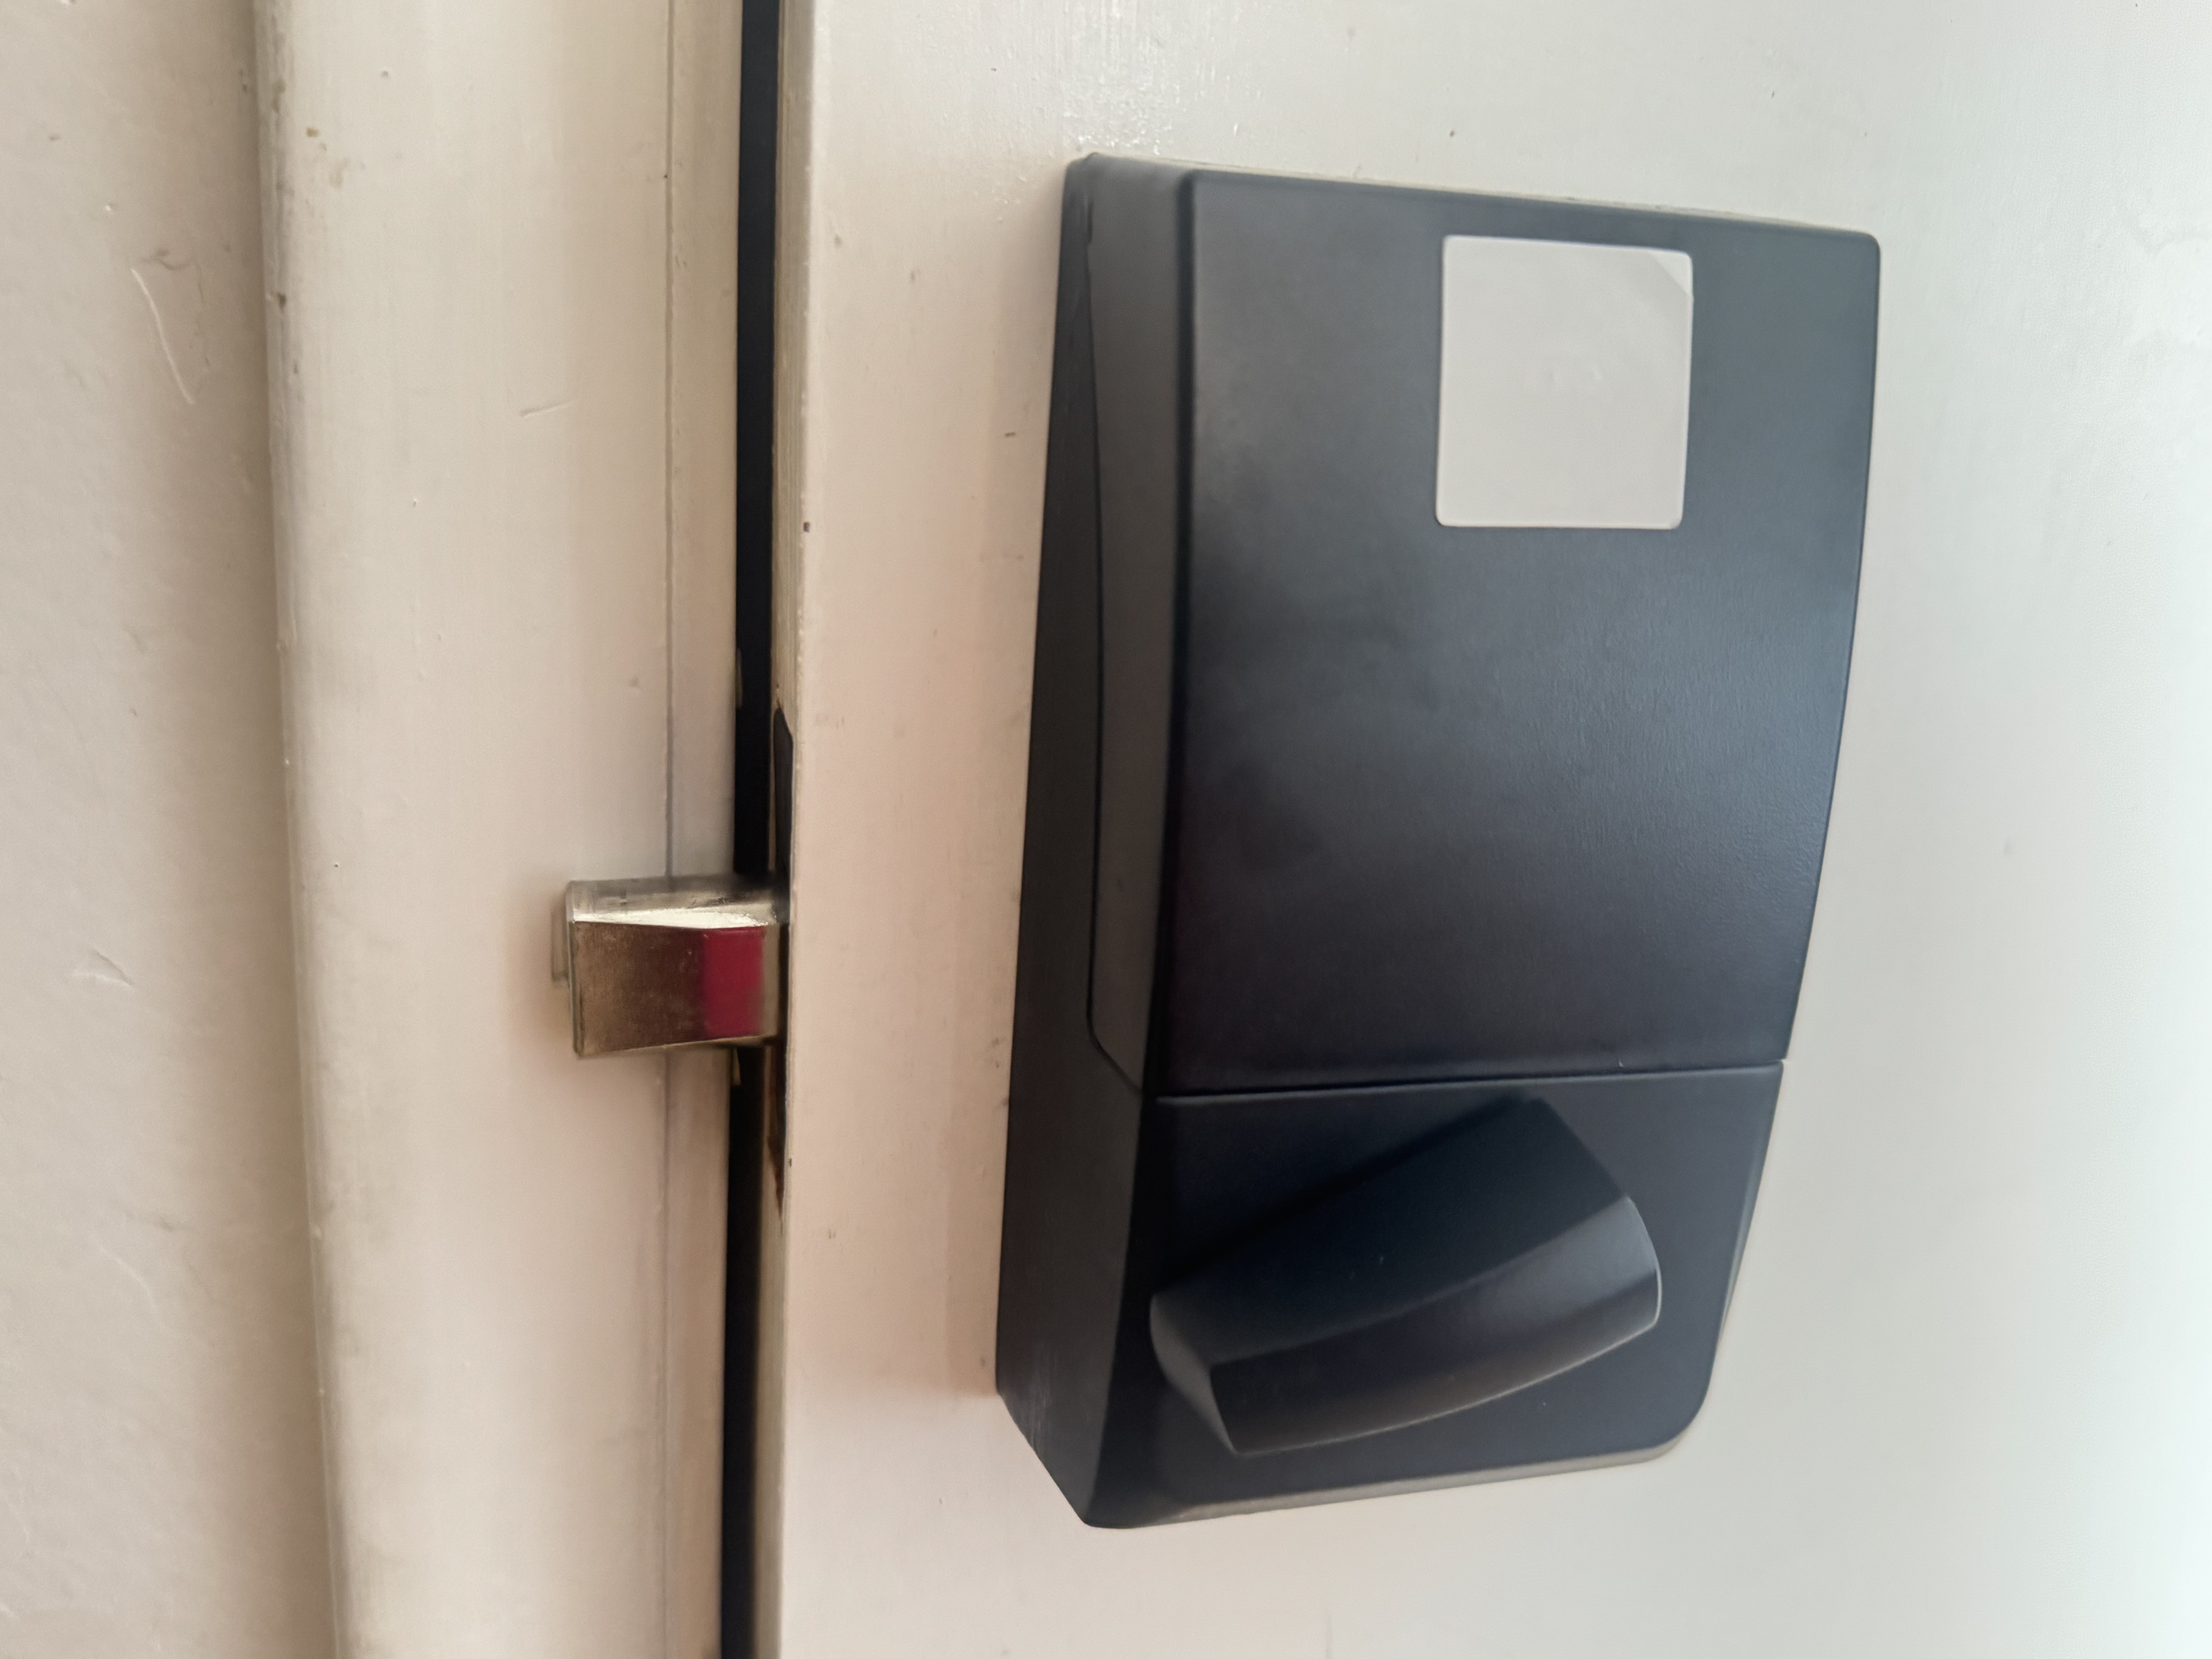
Some HomeKit-compatible locks from August/Yale, or Level have a built-in door sensors, but I chose the the Schlage due to its perceived better reliability and the fact that my original deadbolts used Schlage keys.
Making the Encode Plus more intelligent
Using HomeKit, Shortcuts, and a contact sensor, I was able to create an automation that locks the door after a delay only if the door is actually closed. Let’s dive into how this is done! This article assumes that you’ve already added your lock to HomeKit and have downloaded the Schlage Home app. If you have not done this, follow the instructions that came with your Schlage Encode Plus lock.
Turning off auto lock delay
The first thing we’ll do is disable the auto lock delay in the Schlage Home app. This is because we will be performing the intelligent auto lock using HomeKit and Shortcuts. On your iPhone, perform the following steps:
- Go to the Home Screen.
- Tap Schlage Home app.
- Select the door you want to edit.
- Tap Settings (gear icon).
- Tap Auto Lock Delay.
- Choose Off.
Additionally, I made sure that the two door locks were named as followed in HomeKit:
- Front Door
- Office Door
Setting up a contact sensor
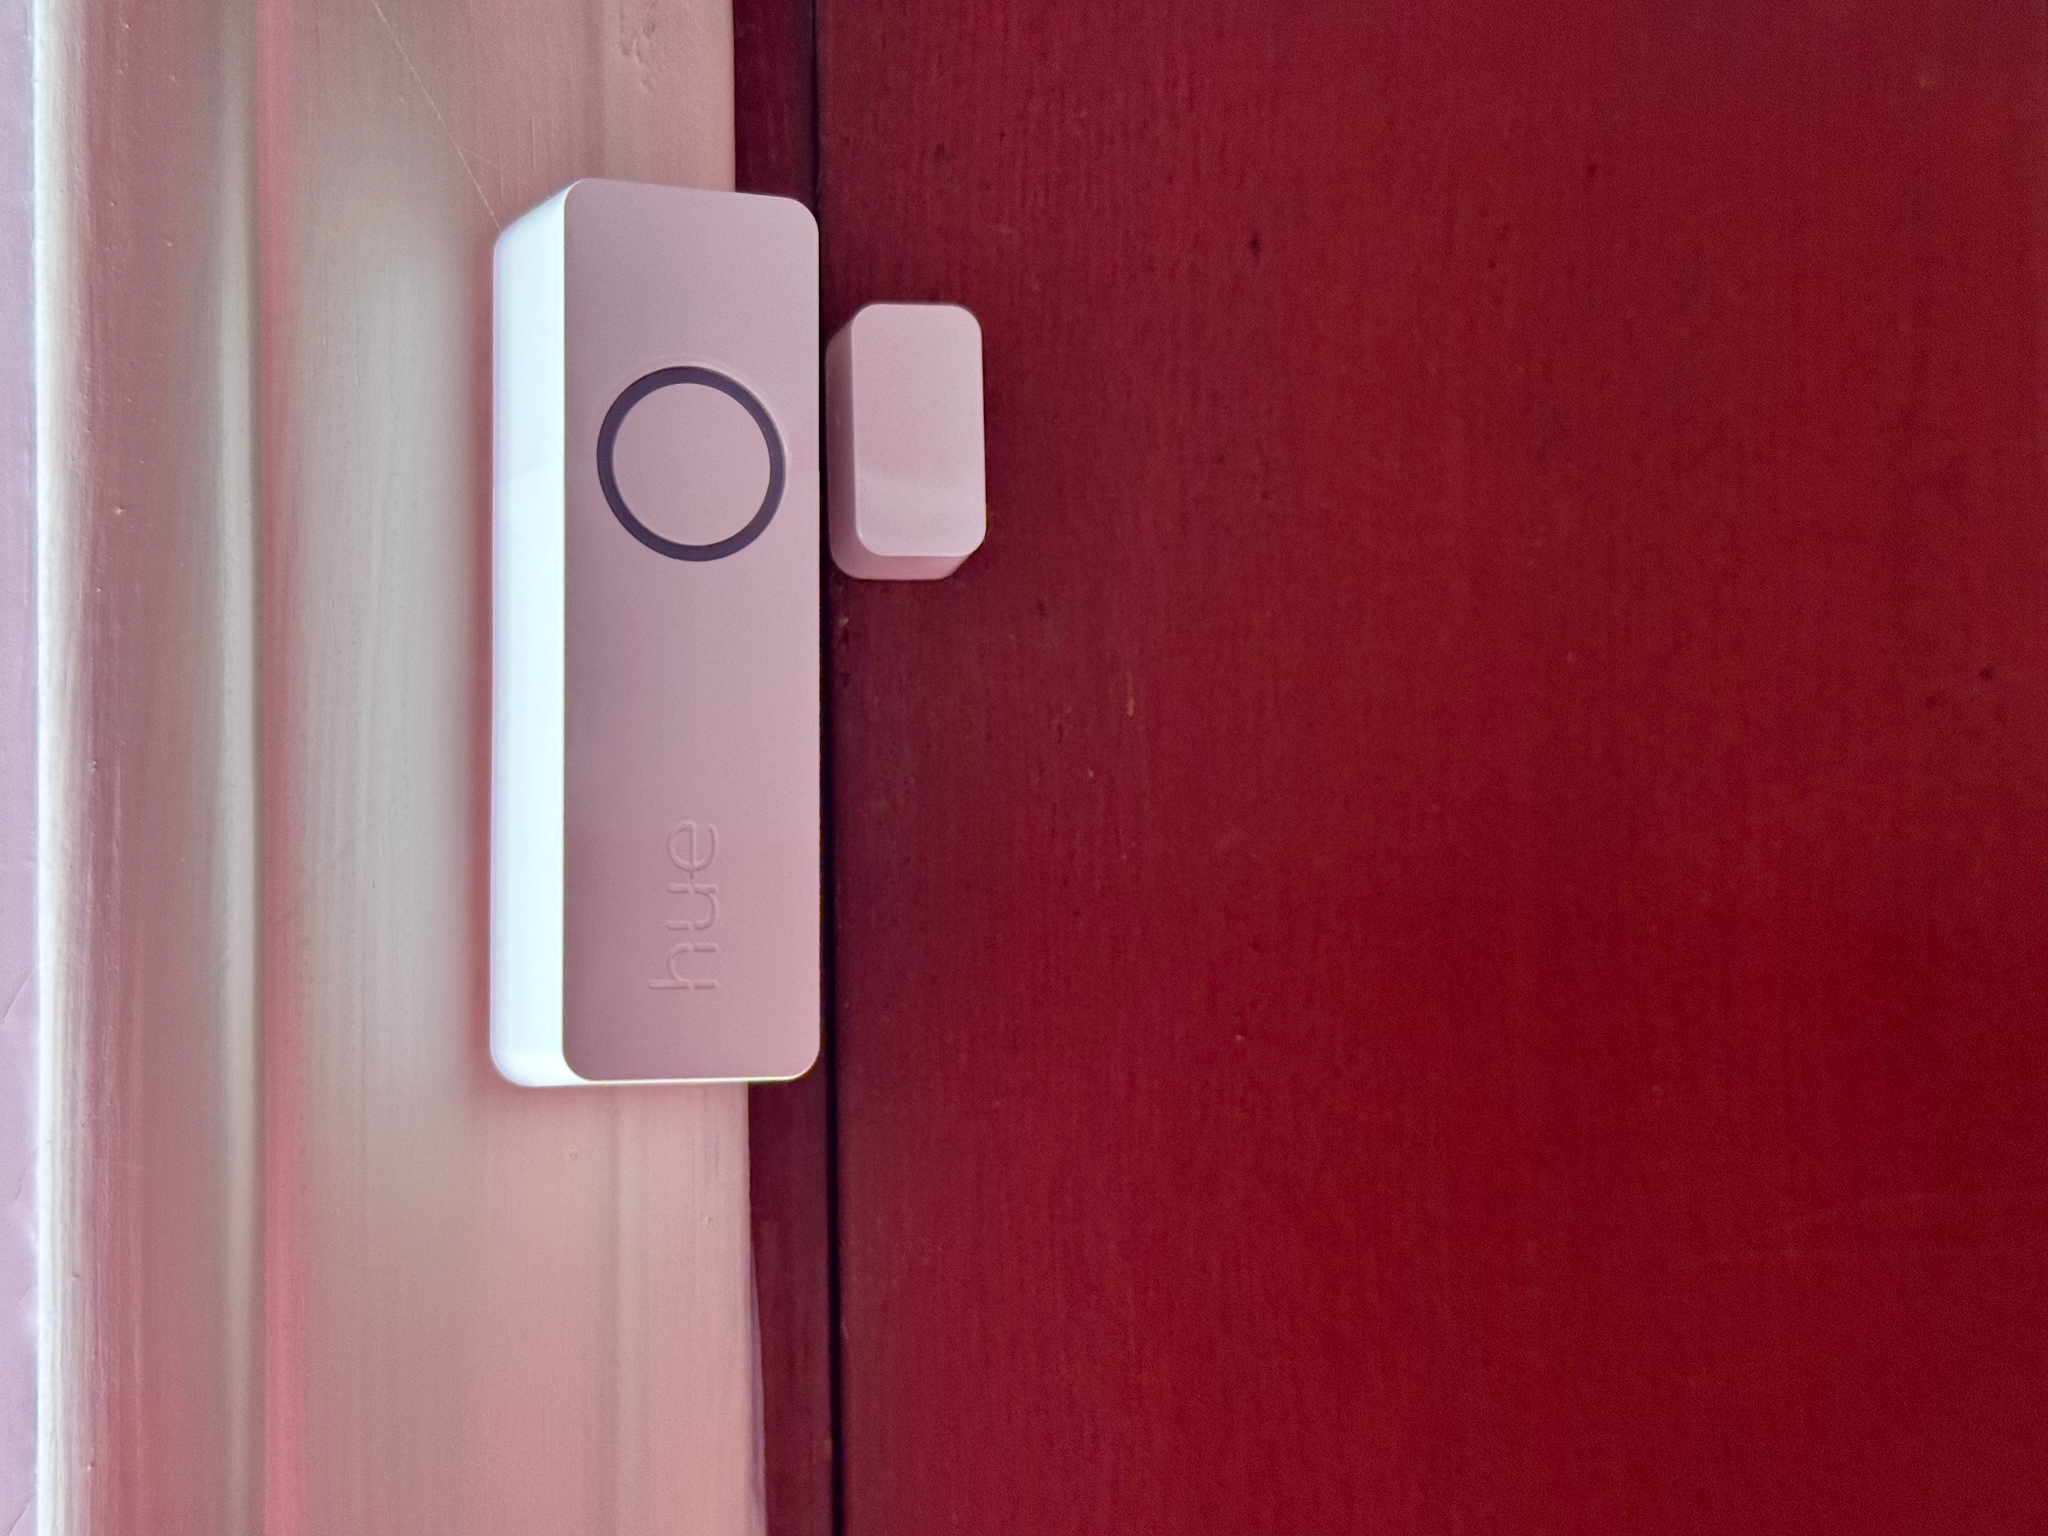
Since the Encode Plus does not have a door sensor, we’ll need to get one that’s HomeKit compatible. While expensive, I have found the Philips Hue Secure Smart Contact Sensor to be very reliable. I was already heavily invested in the Philips Hue ecosystem of smart lights, so I had a Philips Hue Bridge, which the contact sensor requires. Other contact sensors you might consider are the Aqara Door and Window Sensor (requires an M2 or M3 hub) or the Eve Door and Window sensor.
I named the two contact sensors in the house and made sure that they appeared in HomeKit as follows:
- Foyer Front Door Sensor
- Office Door Sensor
In my case, I placed the door sensors at the top of the door frame and door.
Creating the automation
To create the Home automation that ties the contact sensor with the door locks, follow these steps in the Home application on your iPhone, iPad, or Mac:
- Open the Home app.
- Tap Automations.
- Tap +.
- Choose Add Automation in the menu that appears.
- In the sheet that appears, choose A Sensor Detects Something.
- In the list that appears, tap the contact sensor you created in the previous section.
- Tap Next.
- Choose Closes. Keep Time to Any and People to Off.
- Tap Next.
- In the next screen, scroll to the bottom and choose Convert to Shortcut.
Writing the custom shortcut
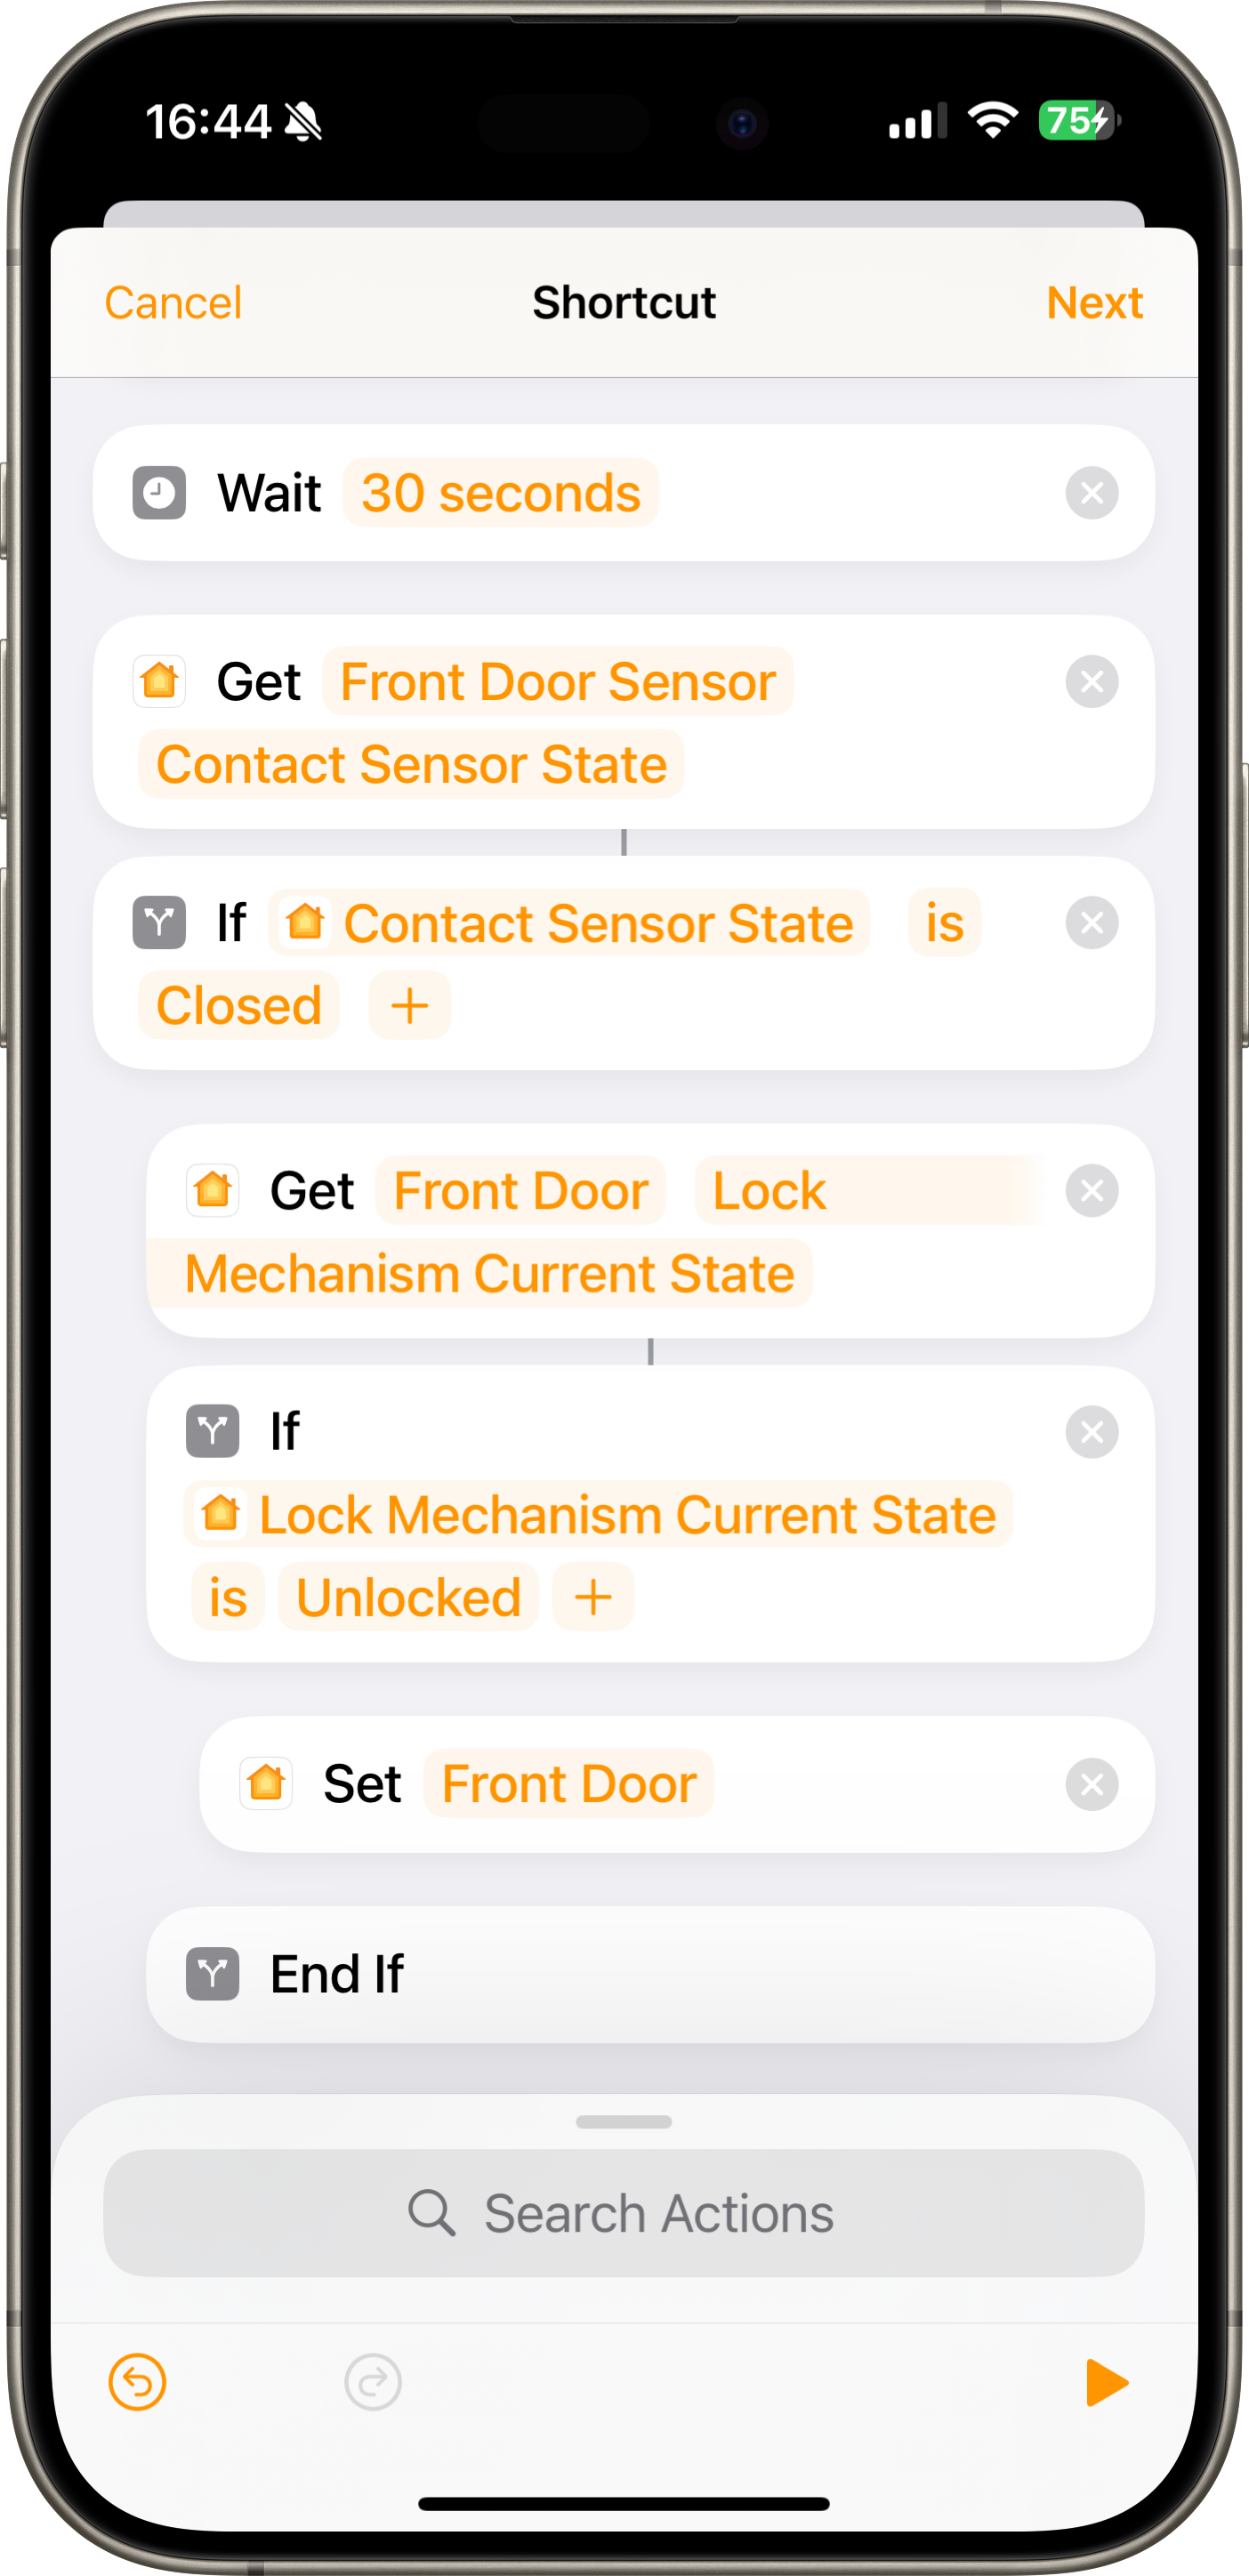
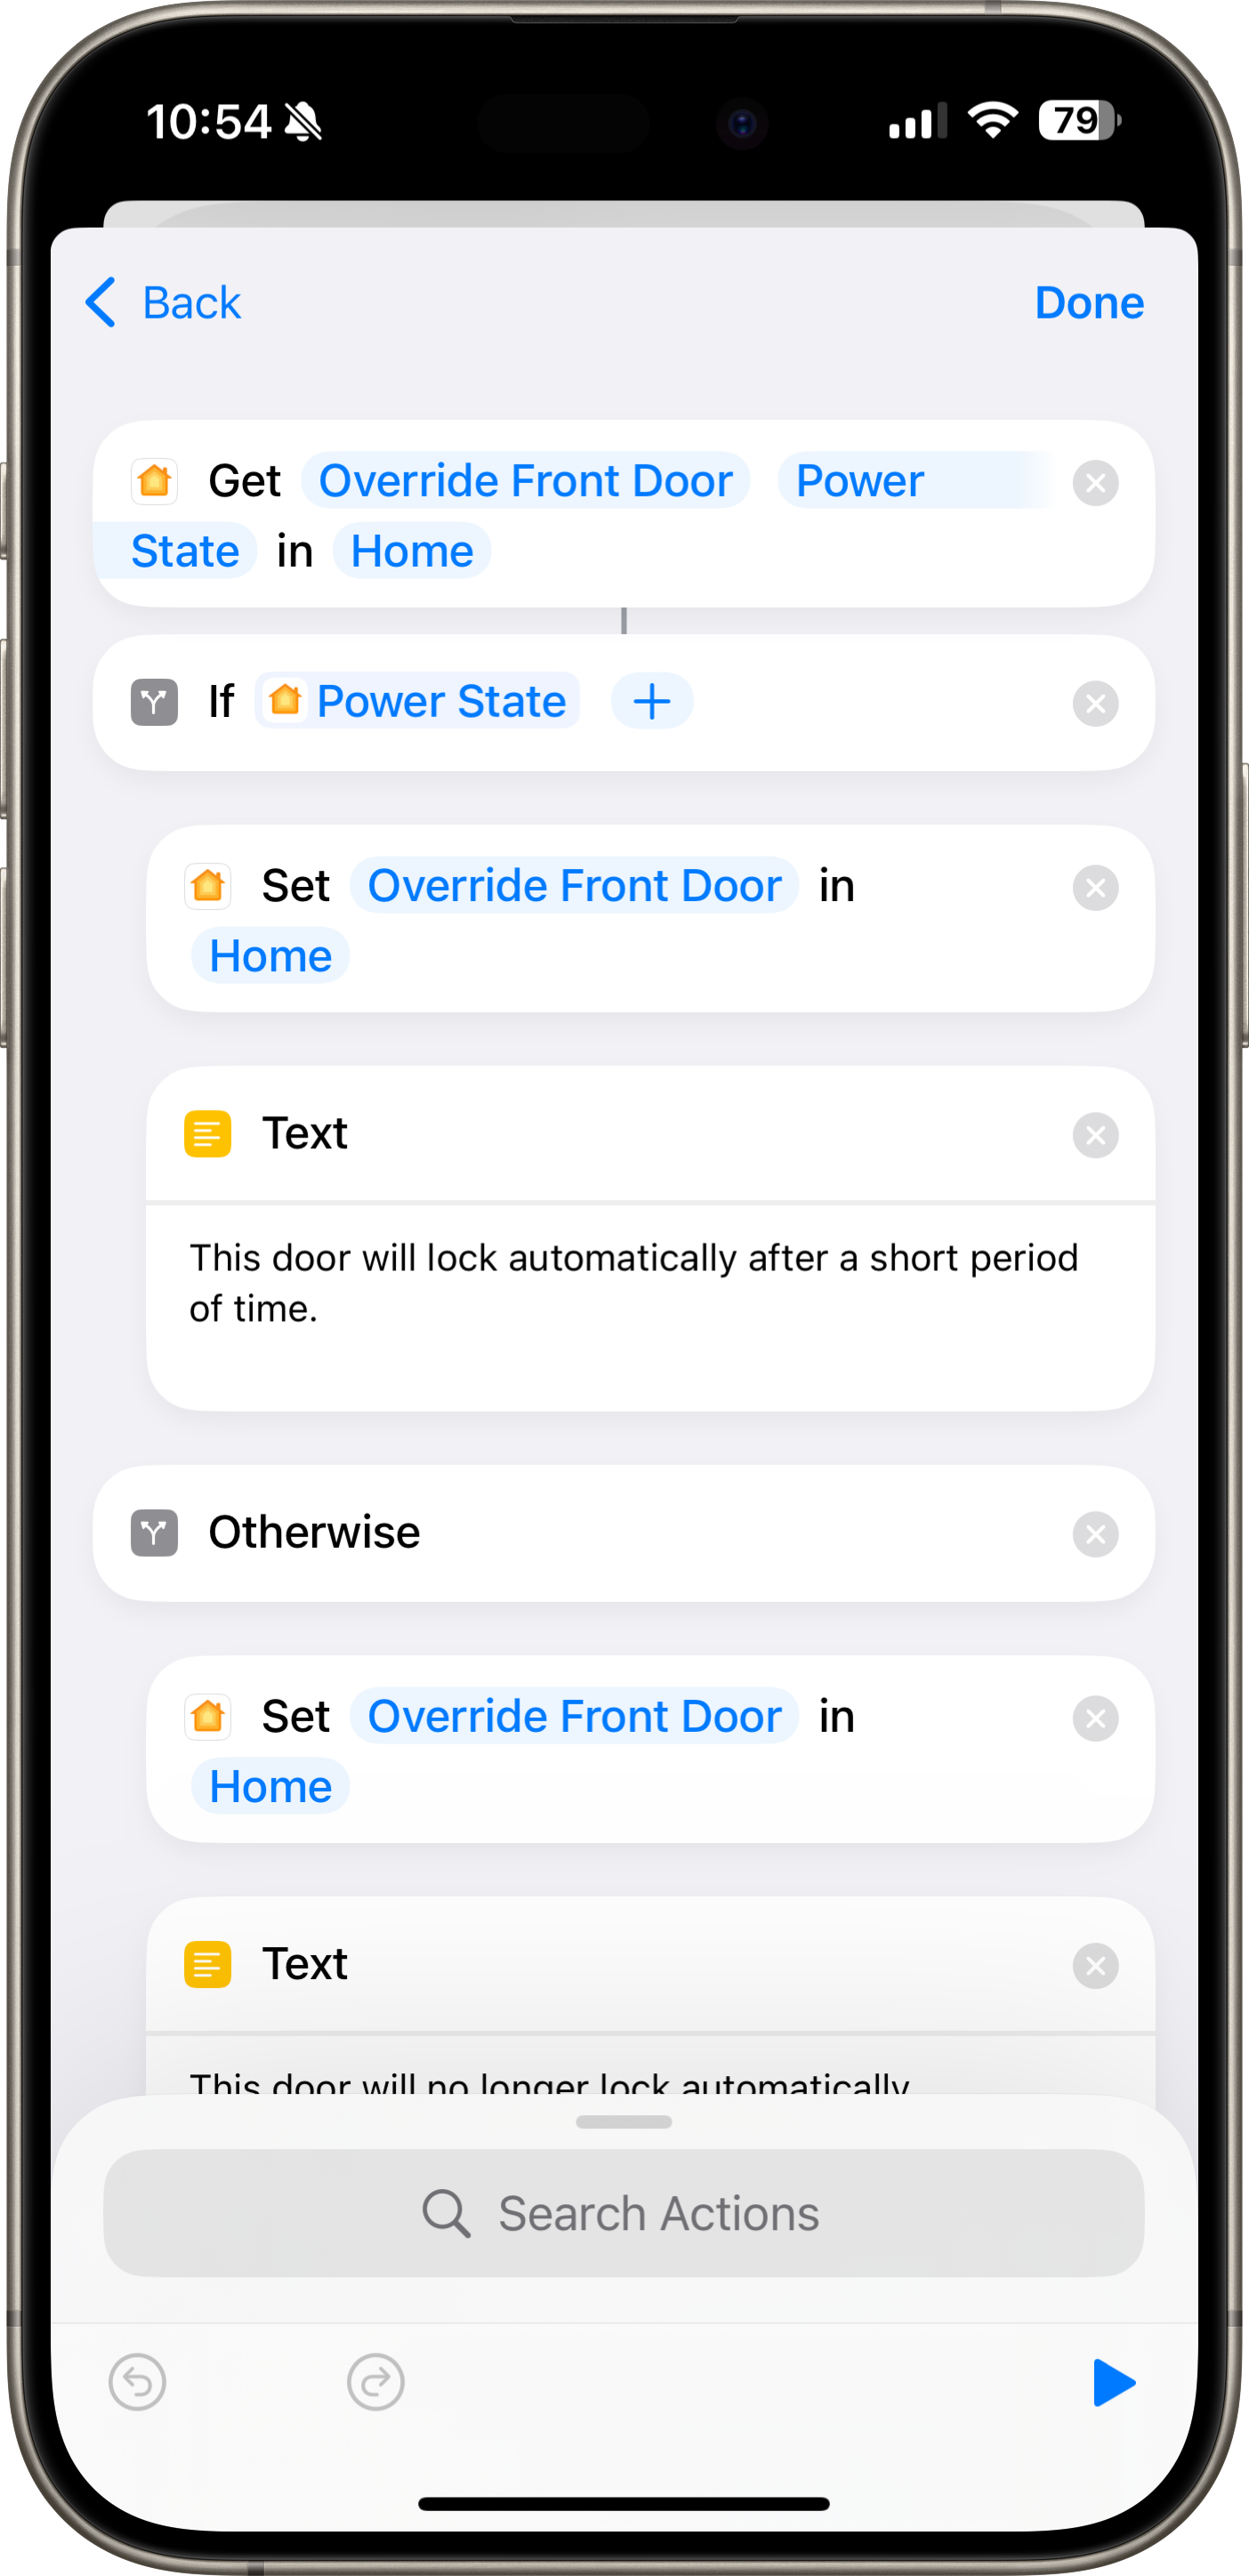
In this next step, we’ll create the shortcut that powers the automation. Basically, we want to first wait the amount of time that we want to delay the lock. Then, we want to make sure that the door is actually closed before deciding whether to lock the door. If the door is still open, we do nothing. Otherwise, we lock the door. Add the following actions to the shortcut:
- Wait action. Set it to the amount of time you want to wait before auto locking. For instance 30 seconds.
- Get state action. Set it to the door sensor’s Contact Sensor State.
- If action. Check if the door sensor’s Contact Sensor State is Closed. If true, add the following actions.
- Get state action. Set it to the door’s Lock Mechanism Current State.
- If action. Check if the door’s Lock Mechanism Current State is Unlocked. If true, add the following action.
- Control Home action. Set it to the door lock to lock.
The screenshot below depicts the actions that you need to add:
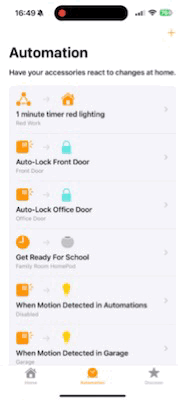
Repeat these steps for additional locks and door sensors you have in the house. In my case, I have two Home automations, one for the front door and another for the office door to the garage.
In practice
Now, I can open the door and leave it propped open if I’m bringing groceries into the house from the garage without fear of the deadbolt automatically locking. When I finally decide to close the door, the lock will automatically engage after thirty seconds. If I manually lock the door, the automation will still run but do nothing (since the door is already locked).
Notifications galore
When you have two door sensors and two locks connected to HomeKit, you will receive notifications every time a door is opened, closed, locked, and unlocked. Every device connected to this home might receive these notifications, so be prepared for an onslaught of beeps on your Apple Watch, iPhone, iPad, and Mac. If this bothers you, you can do the following on each device you wish to suppress these notifications:
- Go to the Home app.
- Navigate to the Room in which the sensor or lock belongs to.
- Long-press or right-click on the lock you wish to edit. For the contact sensor, tap or click on it.
- Choose Accessory Settings in the menu that appears.
- Tap Status and Notifications.
- Disable Activity Notifications.
- Disable Include in Home Summaries if desired.
More information on managing your notifications for Home accessories can be found on Apple’s support website.
Caveats with this solution
Despite being much better than relying on the Schlage’s auto lock delay feature, this solution is not perfect. The door sensor will consider the door closed if it’s left slightly ajar. That’s because the magnet on the door is still within range of the door sensor. Now, this can be useful when I hear someone returning home and I want to unlock the door and open it slightly without triggering the automations.
But, if I opened the door all the way and then closed it so it was just resting against the door frame, the automation would kick off in thirty seconds, and I’d have the scenario that I was trying to prevent in the first place. The deadbolt would engage, and I would have to unlock the door, close the door, and lock the door.
Lastly, the locks and door sensors do have batteries, so I have to be mindful to replace them periodically. The battery percentages for each accessory can be seen in the Home, Schlage Home, and Philips Hue apps. Over two months in, the locks are at 91% and 92% respectively, with the both door sensors at 100%. I wish the rest of my Apple devices got such good battery life!
Advanced: Overriding the automation with a virtual switch
There are times when I don’t want the auto delay to ever engage. In those times, I’ve set up a virtual switch (using a Homebridge dummy switch) in HomeKit that I can toggle on and off. When enabled, the two Home automations will not run when triggered. I can open and close the door all I want, and the lock will never auto lock.
Homebridge can be complicated to install and requires an always-on device running in your house (like a spare Mac mini or a Raspberry Pi). If you don’t want to go down this route, you can buy a smart switch and use the on/off state in the following Home automations. Just be careful not to plug anything into the smart switch, as this may cause problems since the switch is now being used for two purposes.
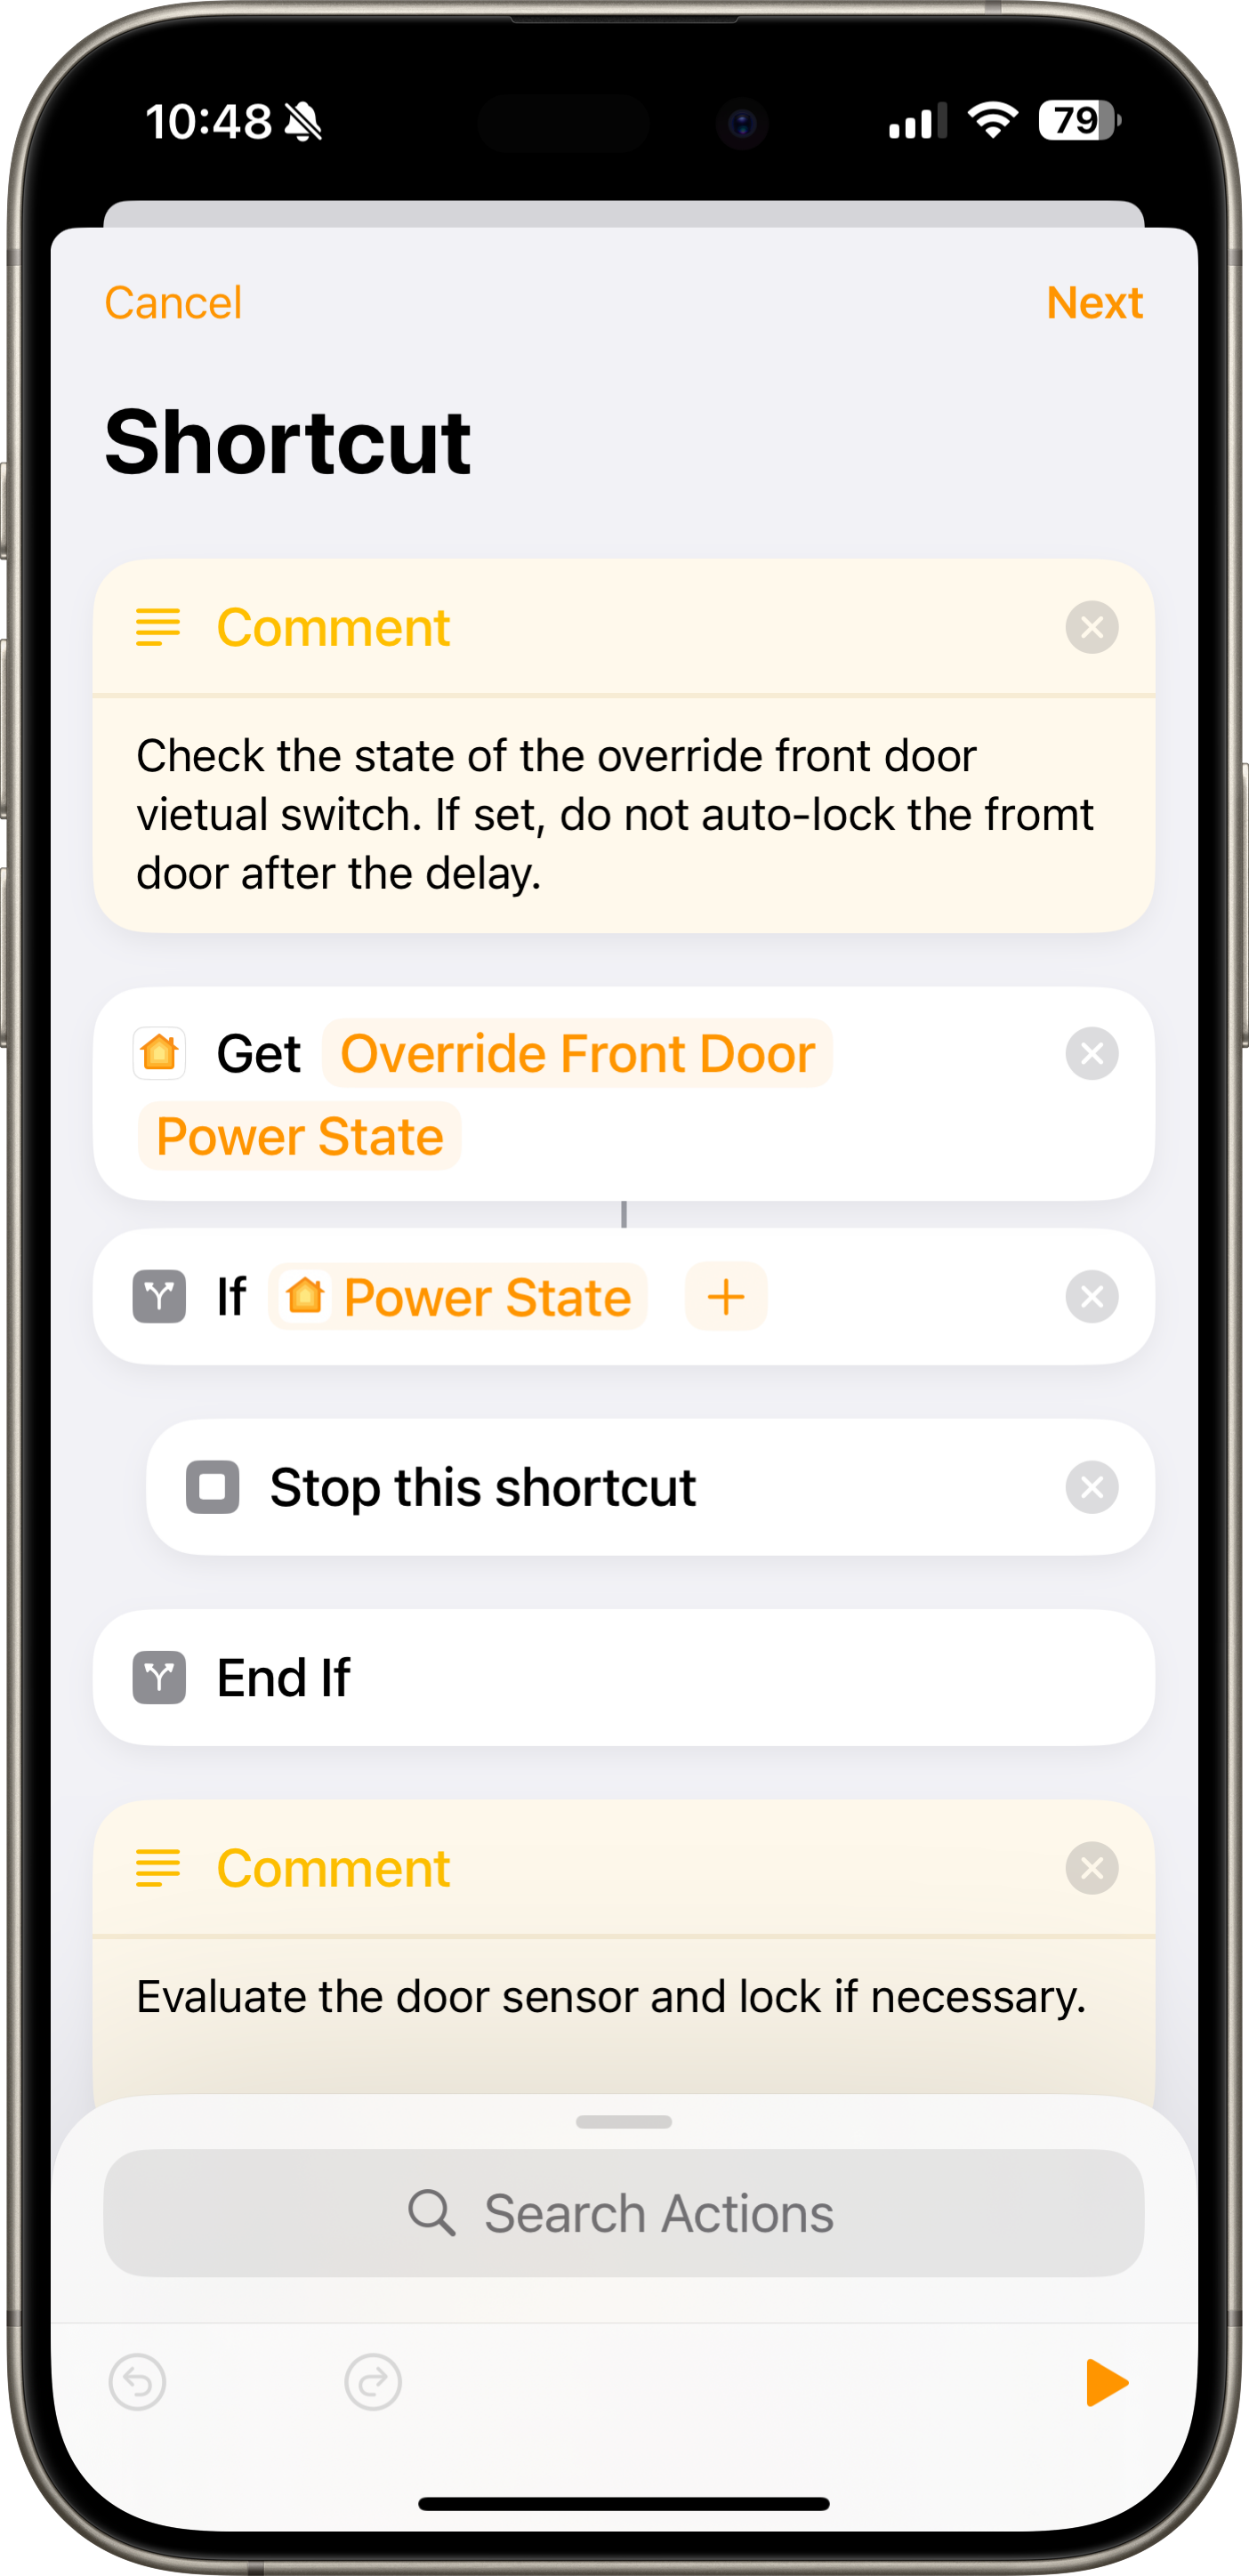
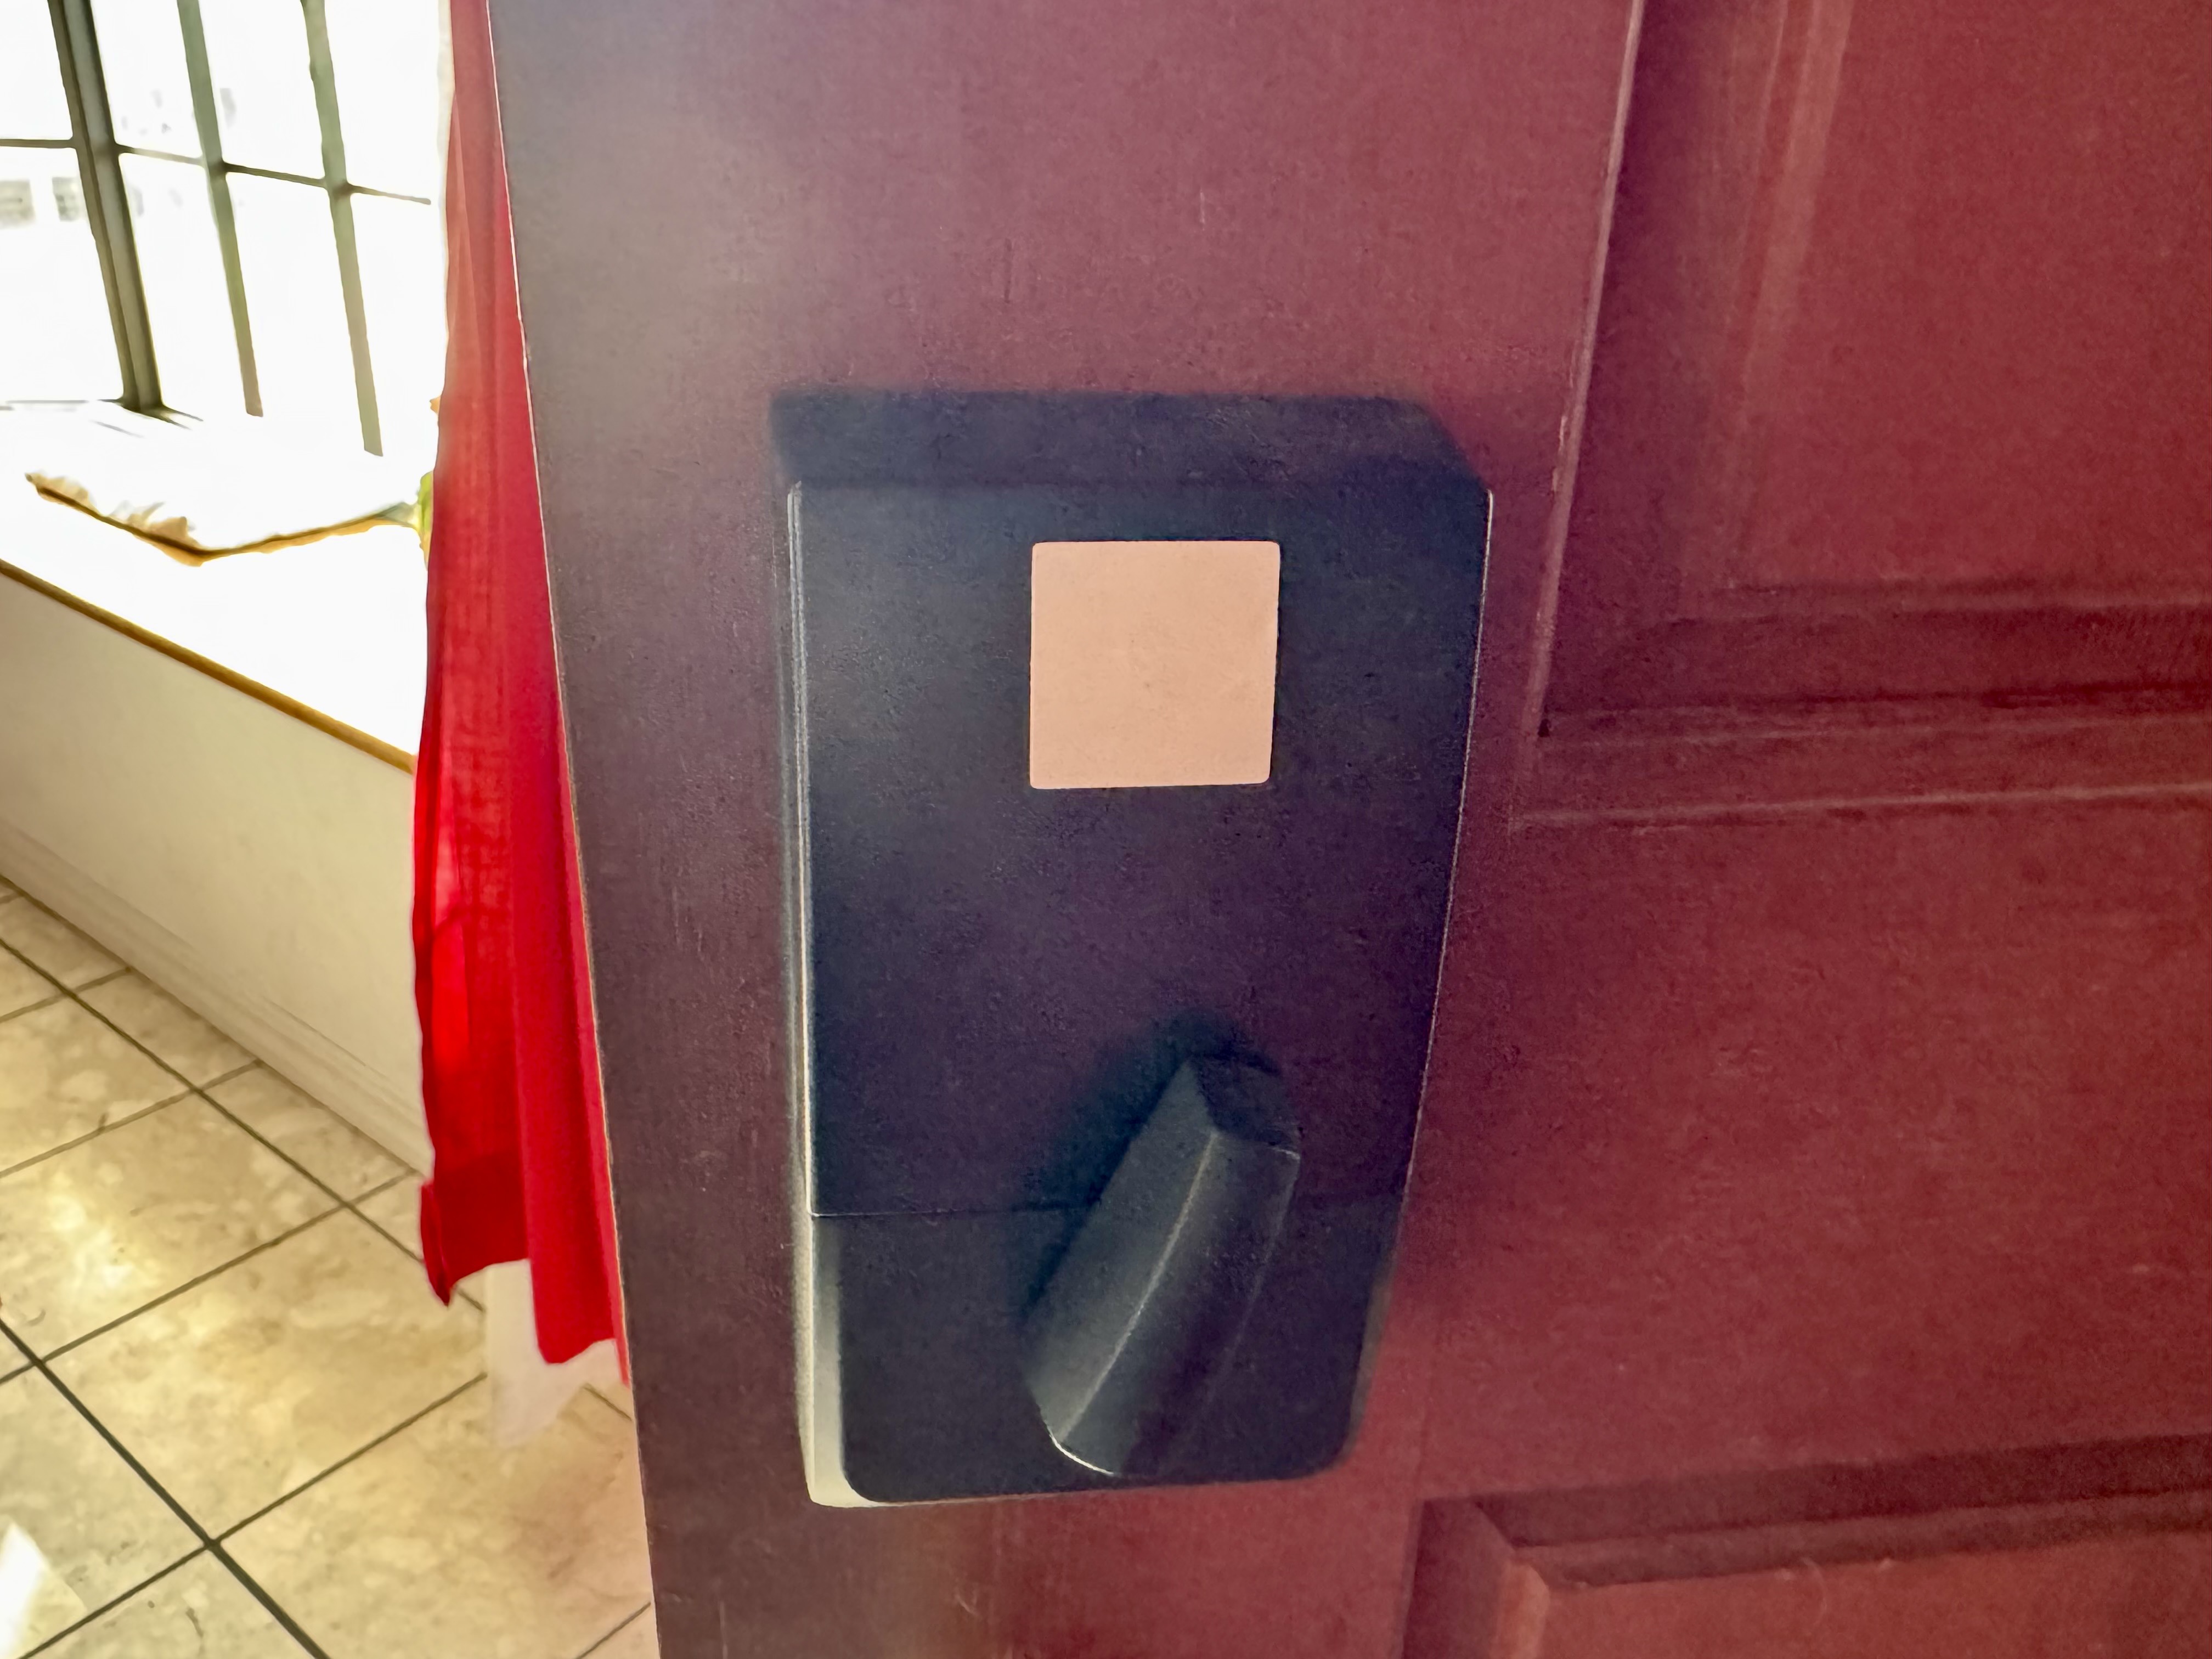
To more easily toggle the override, I have placed an NFC sticker on the lock. I created a Personal Automation that runs on my iPhone whenever I tap the device to the sticker. The shortcut that the automation runs simply toggles the virtual switch and displays a notification.
Finally, I have two more Home automations that sets the office and garage lights to red when the virtual switch is on and turns off these lights when the switch is off.

Wrapping things up
These automations have been running for the past several months, and they have held up well. Everyone in the household knows how the system works and is comfortable with it now.
If you have purchased a Schlage Encode Plus lock for your house and want to add a bit more intelligence to it, give this workflow a shot! If you have created automations in your home for your doors and want to share your experiences, drop a comment down below.
Product links
- Schlage Encode Plus on Amazon
- Philips Hue Secure Smart Contact Sensor on Amazon
- Philips Hue Bridge on Amazon
- Aqara Door and Window Sensor on Amazon
- Aqara Smart Hub M2 on Amazon
- Aqara Smart Hub M3 on Amazon
- Eve Door and Window sensor on Amazon
- Homebridge
- Homebridge Virtual Dummy Switch Plugin
Disclaimer: This post may contain affiliate links. If you make a purchase through one of these links, I may earn a small commission at no additional cost to you. Thank you for supporting my blog!


Leave a comment