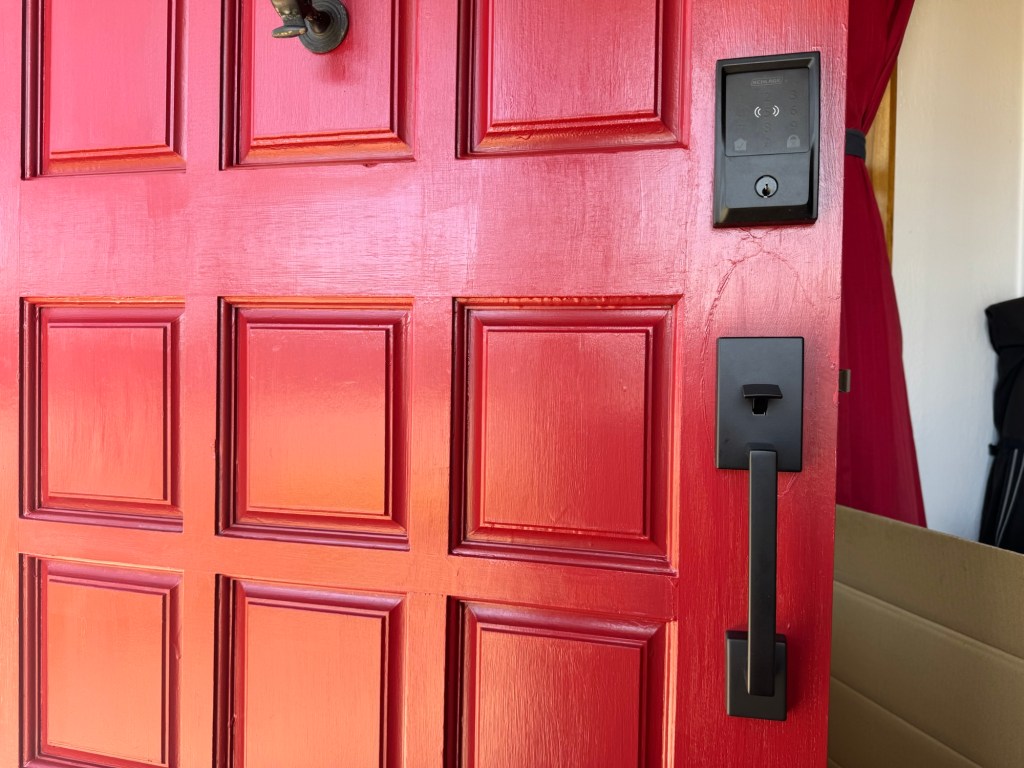
There are some things that I’ll leave to the professionals, like finishing our garage, and there are other things that I am more comfortable doing myself. This week, I re-painted our front door and installed a new Schlage Century handleset with a Latitude lever. When we bought our Schlage Encode Plus deadbolt, I didn’t bother changing out the door knob. Within the past few weeks, however, the front plate started to get loose and shift up and down. I could have tightened it all up, but I figured the door knob was telling me it was time to be replaced with the Encode Plus’ matching handleset.
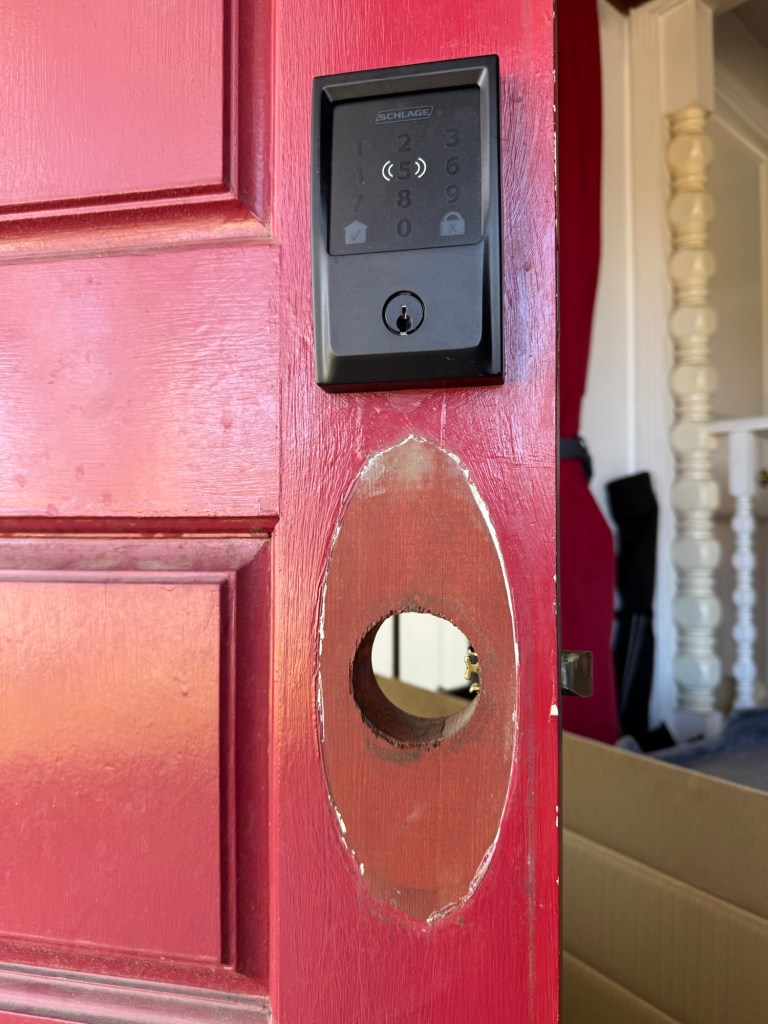
Removing the front plate revealed a faded outline in the door and the original wood. Was this the original door knob that came with the house? Well, I couldn’t have that, so that meant re-painting the door.
I still had a can of the red paint we used five and a half years ago (Kelly Moore 1250-74 Seattle Red). Opening it up revealed the paint to be in good shape, and there was enough to cover the whole door.

I should have done a more thorough cleaning of the door, but I just dusted it off and used some sandpaper to give the new paint something to adhere to. I removed the old door knob, door knocker, and applied some blue tape around the Encode Plus and window.

Then, I got to work. Because the door was going to be open for several hours, we had to move Newton the Cat into our master bedroom. He’s an indoor cat, and we didn’t want him to run outside or get his paws wet with red paint!

It took me an hour and a half to finish painting the entire door. The paint became dry to the touch within 30 minutes to an hour. I am no painting expert, but I was pretty happy with how it turned out. The difference is really noticeable between the faded paint and the new coat of Seattle Red. I let the door air dry for an extra hour before closing it carefully.

Before installing the handleset, I waited a full 24 hours for the paint to dry. I had Rae buy me a 3/8” drill bit since all of the ones I had were much smaller. The big bit was necessary because the Schlage handleset has a bolt which is installed 9 inches below the cylinder.


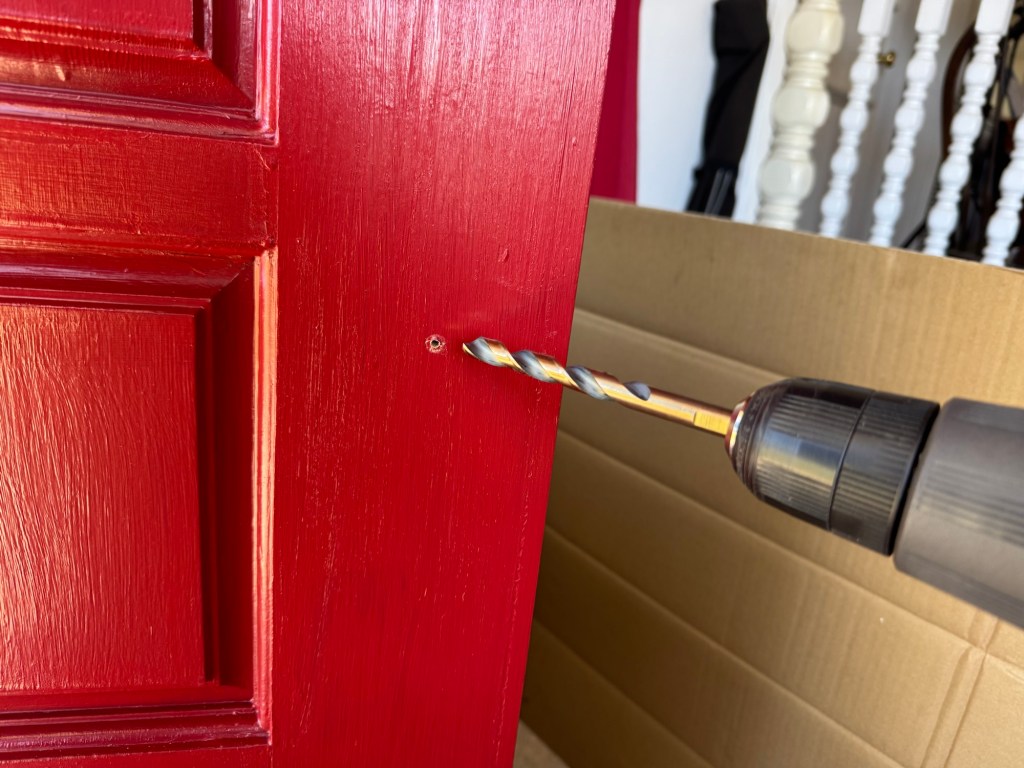

Watching some videos on YouTube, I performed the following steps to get that hole drilled into the door:
- Put some painter’s tape on the cylinder hole.
- Mark the sides of the circle.
- Measure out the center point.
- Mark 9 inches down from the center point.
- Tap a nail just barely into the center point.
- Apply some painter’s tape around the hole.
- Drill a pilot hole through the door with a smaller drill bit.
- Reapply painter’s tape.
- Drill the larger hole with the 3/8” drill bit.
I should have drilled the larger hole from both sides, but it turned out okay still. I sanded away some stray wood bits from the back of the door, which would not have been present had I drilled from the back door too. The bolt went in cleanly, and the rest of the installation was a simple matter of tightening some screws.

Yes, you can still see a faint outline of the original door plate; I should have sanded that area down more. But it doesn’t bother me that much, so I will keep it as is until I have to re-paint the door again in a six or so years. It will be a lot easier, since all I’ll need to do is apply painter’s tape around the lock, handleset, and window.
Product links
- Schlage FE285 CEN 622 LAT CEN Front Entry Handleset with Latitude Lever, Lower Half Grip, Matte Black
- Schlage Encode Plus CEN 622 Wi-Fi Deadbolt Smart Lock
Disclaimer: This post may contain affiliate links. If you make a purchase through one of these links, I may earn a small commission at no additional cost to you. Thank you for supporting my blog!


Leave a comment