
We’ve lived in our current house for nearly 19 years. It’s hard for me to believe, but that’s longer than I lived in my childhood home in San Diego! We’ve undergone several major projects outside of the house, such as remodeling the pool, replacing the fences, re-landscaping, and painting. Last year, we upgraded the electrical and added an EV charger, along with completing an earthquake brace and bolt retrofit underneath the house. At the start of 2025, we had our garage finished, transforming what was once a dark and dusty space into a bright and clean place to park our car and house our workshop.
At the end of 2024, several of our neighbors were updating their garages. I liked what Renato and his team at GarageMonkey had done with their spaces, so I gave him a call to get started working on ours.

After almost two decades in this house, I had several goals I wanted to accomplish with the update:
- Epoxy flooring.
- New garage door.
- Insulation.
- Cover the ceiling.
- More electrical outlets.
- Retain the ability to park two cars.
- Wiring for network and camera feeds.
- Vent for 3D printer.
- Outside door.
- Slat walls to hold cleaning and gardening tools, bike helmets, and other accessories.
- Paint the walls.
Let’s take a look at each of the goals one by one.
Epoxy flooring
I love the look of epoxy floors. The old concrete we had previously was dusty and sad to look at. I remember painting the floors brown when we were making our set for Autumn Gem in 2008.

I wanted all of that gone and replaced by a nice and durable epoxy floor. We chose gray, dark gray, white, and black flecks, along with a polyaspartic top coat so the floor doesn’t turn yellow over time.

Dust and dirt still accumulate in the garage, but they are harder to see on epoxy floors. I have an electric blower, but I am looking to get a battery-powered blower to clean the garage. Drop a comment down below if you have recommendations!

I read that epoxy coatings can last up to 20 years, so if this blog is still around in 2044, I’ll report back on its state!
Grass runners
I want to bring a touch of nature to the garage, so I ordered this 2’7” by 21’ artificial grass runner from Ottomanson. The runner will go from the entrance to the office all the way across to the backyard pathway door. This will be good for the times when I want to go into the garage but don’t want to put on shoes or even slippers. To keep it from sliding, I got two long rolls of Gorilla Grip drawer and shelf liners.
Workshop and bike rugs
Underneath the bike racks and bikes is a simple 6×8 foot recycled polyester rug from AtHome. There’s a large warehouse near the San Jose Airport and the stadium for the San Jose Earthquakes. There’s so much to see there, and I’m looking forward to returning to see what other home improvement products to buy for the house.

I’m trying to decide whether to get another one of these rugs or something more substantial for the workshop area. The polyester rug doesn’t have much cushioning or warmth to it.
New garage door
Our previous garage door was wooden, heavy, and loud. It had started to bow on either side, and this led to leaves, bugs, lizards, and the occasional possum to venture into the garage. The new garage door is made out of metal and has a rubber weather strip below and on the sides to prevent things from getting in.

Side-mounted opener
On Reddit, I read this post where someone had installed a side-mounted garage door opener. I had never known that these products existed, and I immediately told GarageMonkey that I wanted one of them. The Liftmaster 98022 replaced our own Chamberlain 9950D 1/2 HP opener. Side-mounted openers are over twice as expensive than traditional chain-driven motors, but they are quieter and more space-efficient. If you plan to re-do your garage, I highly recommend you think about replacing your traditional opener with a side-mounted one.
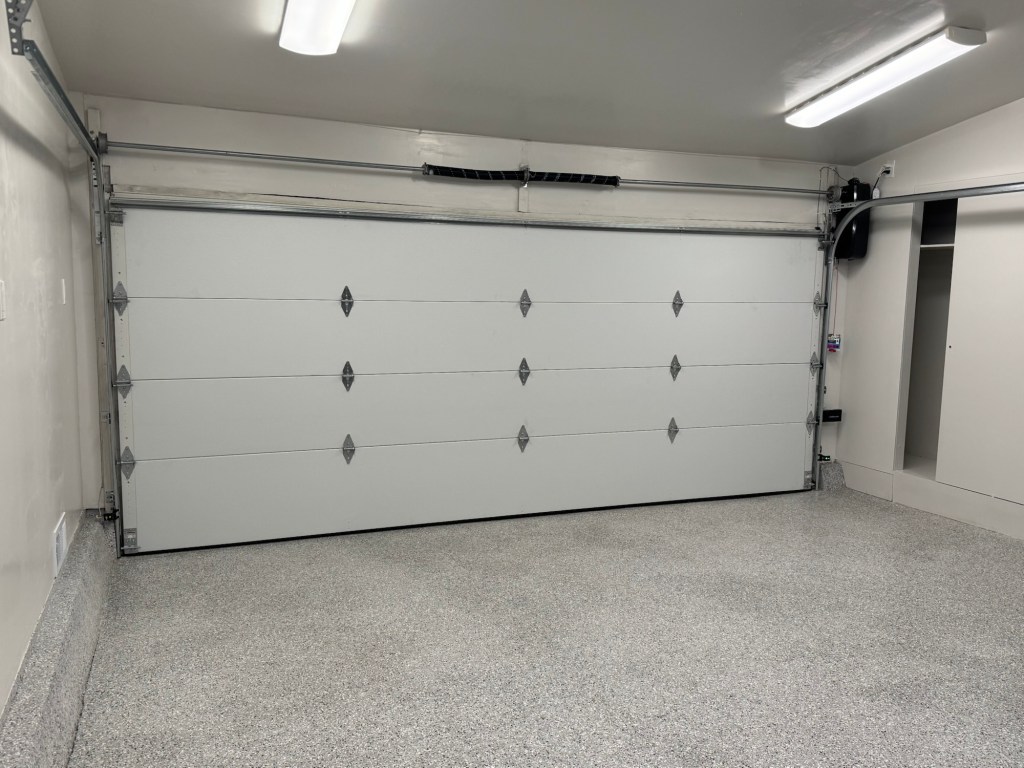
I was able to install my security camera, garage door light, and heat detector in the space where the Chamberlain used to be. The garage feels much more spacious now!

From MyQ back to HomeKit
I may write a separate post on this, but one of the downsides of the Liftmaster is its reliance on the MyQ app to open and close the garage door from my phone. Liftmaster used to integrate with HomeKit via a hub product, but the company discontinued it several years ago. Fortunately, I had already bought a Meross Smart Garage Door Opener Remote for the Chamberlain. To integrate it with the Liftmaster, I just had to fill out this form to get a free accessory remote from Meross. The remote plugs into the Meross device and allows it to open and close the Liftmaster. I can now control my garage door using Siri and Shortcuts again.

If I didn’t have the Meross, I would have purchased a ratgdo32, which integrates natively with the Liftmaster (and other) garage door opener.
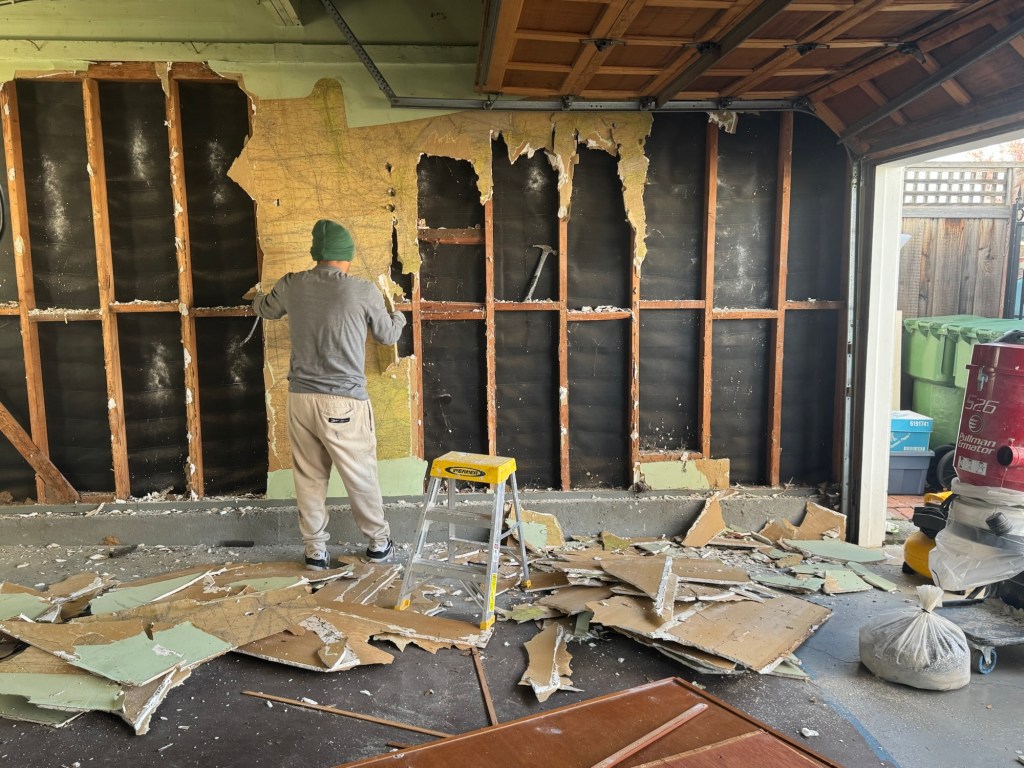
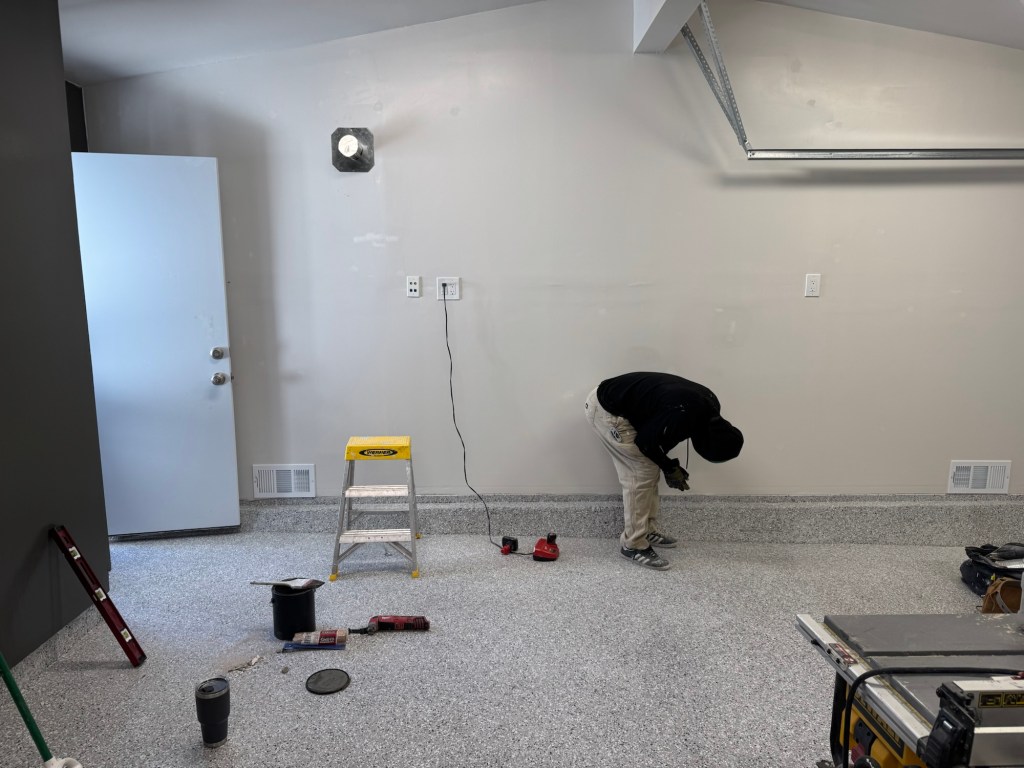
Drywall and Insulation
Since I wanted to be able to work in the garage, adding insulation to the side wall and ceiling was important to me. We removed the existing drywall on the non-house facing wall. It originally had an elevated shelf and a giant wallpaper depicting ham radio stations a sectional aeronautical chart of the continental United States. Here’s a photo of the wall before, during demolition, and after the drywall was installed and painted.


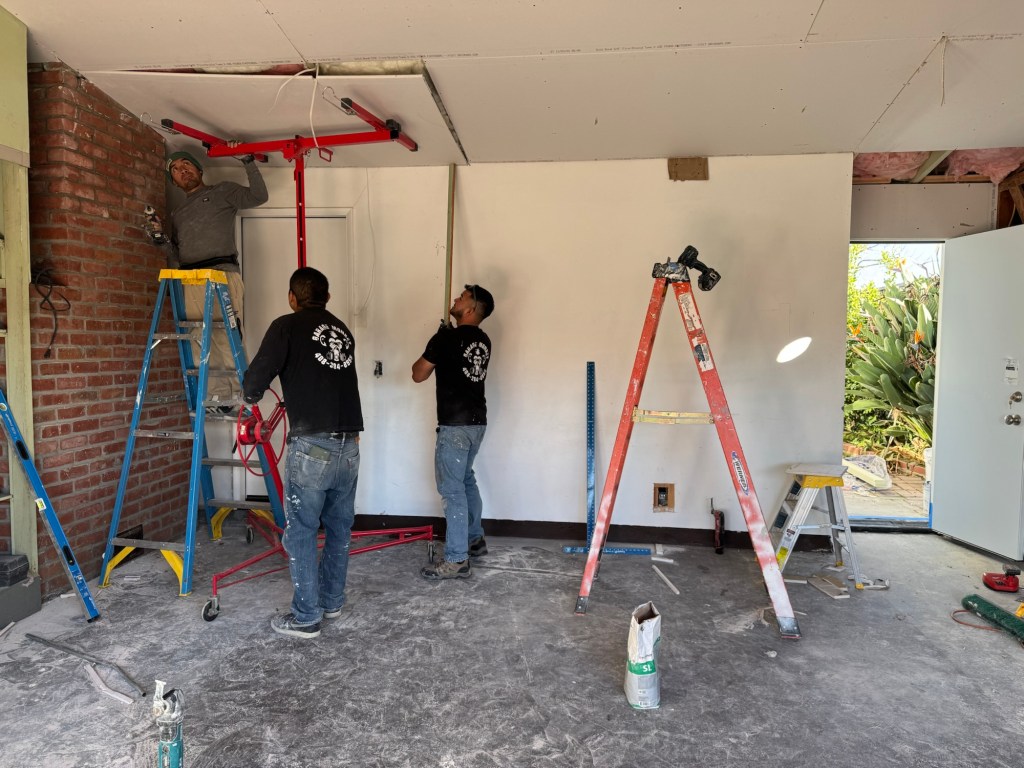
Covering the ceiling
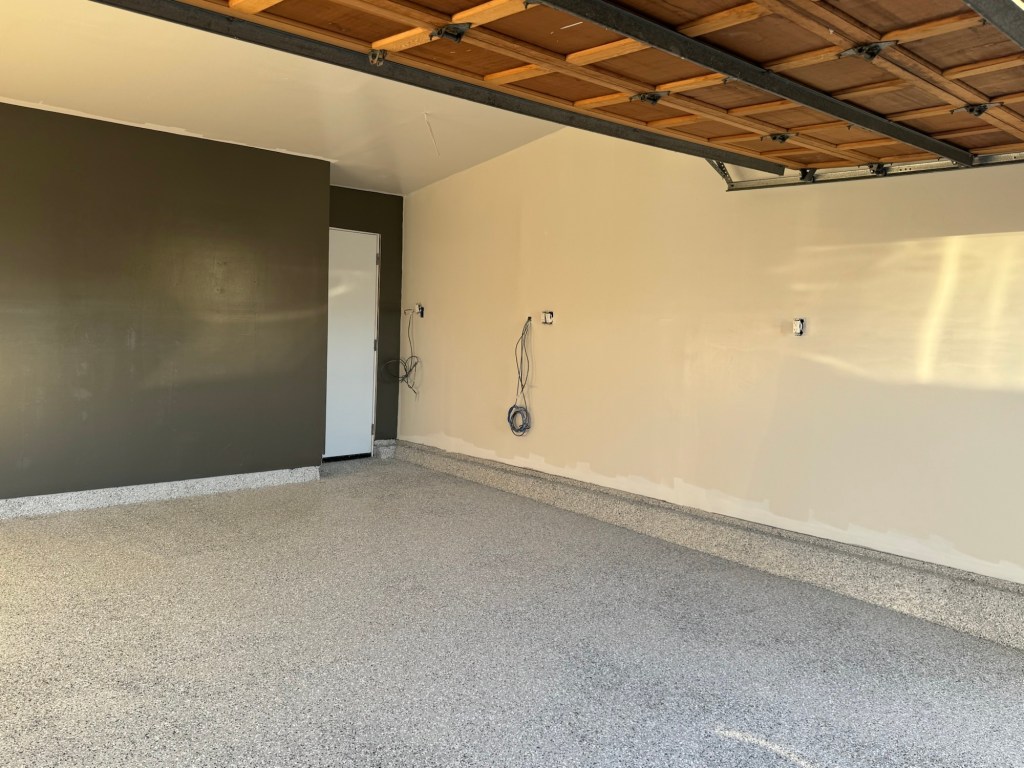
Exposed rafters gave my garage a rustic look, but I wanted the clean look of painted drywall on the ceilings. We also added four LED panel lights on top. They don’t change colors, and I can’t control them (yet) via HomeKit, but they make the garage the brightest room in the house.

Echo
After construction was completed, I noticed a strong echo in the garage. I thought that the insulation would have reduced this, but I think it’s a combination of the closed off space, the epoxy floor, and the metal garage door. I’m going to look into attaching acoustic foam tiles to the garage door (12x12x2” medium density) and rugs to the floor to reduce the echo. Ceiling baffles might also be an option, but I’d like to avoid it if possible.
I am planning to record videos in the garage, so this is important. Look for a blog post in the future from me regarding my progress!
Electrical
On the same wall, I wanted additional electrical outlets for my 3D printer, computer, networking gear, lights, cameras, air purifier, and other gadgets for the digital workshop. The contractors placed several outlets along the wall for me to plug my stuff into.

Networking and camera wiring
In addition to the electrical outlets, I wanted a hard-wired Ethernet and SDI connections between my office and the garage. I chose SDI over HDMI because HDMI isn’t meant to go much further than 50 feet. Although the cable run ultimately took about 25 feet, I’m happy with the choice to go with SDI. I plan to use one of the SDI ports for a camera or switcher in the garage going into the office.

The other SDI port will be used for a return feed from the office into the garage. With my MixEffect app, this will allow me to control the show from both locations.

Space for two cars
Even though we only have one car, I wanted to make sure that the garage could still accommodate two cars. That meant no permanently installed workbenches, cabinets, or other furniture on the short side of the garage.
We’ve been really happy with our Hyundai IONIQ 6 EV. It’s quick (coming from a Prius), spacious inside, and fun to drive. We have a little over six months left of free charging from Electrify America. As a result, we have only used our Emporia Level 2 EV charger a handful of times. EA’s rates are $0.56/kW/hr, but Silicon Valley Power, our electrical provider in Santa Clara, only charges about $0.16/kW/hr. Going from 0-100% will cost us about $12 at home instead of $41. I wish the rates were the same when we moved into the house 19 years ago. It was just $0.06/kW/hr, which means it would have cost us just $4.44 to fill up a tank of electrons!

On the wide side of the garage, we had pre-existing built-in cabinets with sliding doors. Our EV charger is in one of the cabinets, and I didn’t want to go through the hassle of replacing them and possibly mucking with the electrical conduits there. What’s great about these cabinets is that I can store stuff right up to the roof. You don’t get that ability with typical pre-made, self-standing cabinets.

Bikes
We currently have five bikes and one scooter in the house between the three of us. The kiddo parks his main bike inside the house. It’s easy and more convenient for him since it has a kickstand. The other bikes are:
- Trek 5200
- Trek 2300
- Steel road bike
- BMX bike
The Trek 5200 was my first road bike that I purchased in 1997 or 1998. It was advanced at the time, but over the past 27 years, it has fallen far behind modern bikes. The bike needs a lot of work to get it road-worthy again; the brake pads and cables are worn out, and the front and rear derailleurs need adjusting. Plus, I crashed it over a year ago and bent the rims. I’m debating whether I should put in the work to restore it or just sell or donate it.
Rae’s Trek 2300 is not quite as old as my 5200, but it’s in far better shape. My steel bike that I bought used from a former co-worker was also well maintained. It doesn’t have much modern componentry but it rides smoothly. The kiddo is getting too big for the BMX bike, so it’s just there as a backup in case there’s a problem with his primary bike.
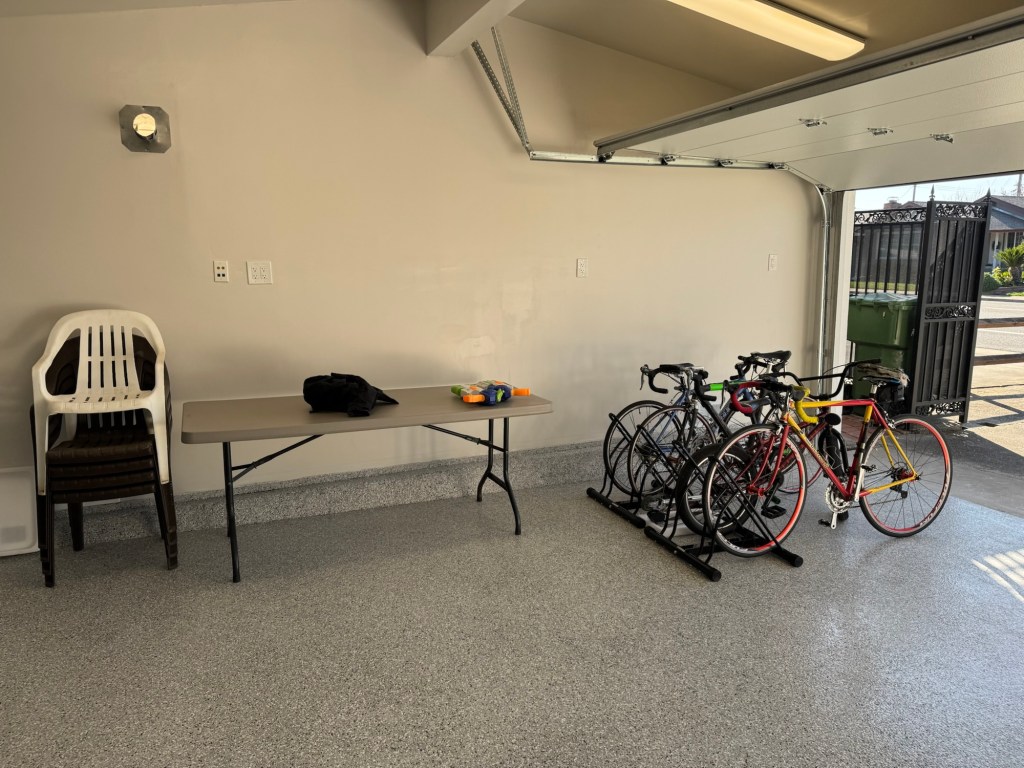
I didn’t want to hang the bikes so I bought two Rad Cycle Mighty Racks that hold two bikes each. They resemble the kind of bike racks I used to park my Diamond Back Silver Streak BMX in at elementary school!
Venting those fumes out
We have yet to start 3D printing using ABS or other filament types that generate dangerous fumes, but our garage is ready for them. I installed a 4-inch vent above where my 3D printer will be situated. Eventually, I will get or create a magnetic attachment and hose combination, so I can easily connect my 3D printer to the vent. If I get a second printer or a laser cutter (or both), I should be able to adapt the system so both printers vent out through the same duct.
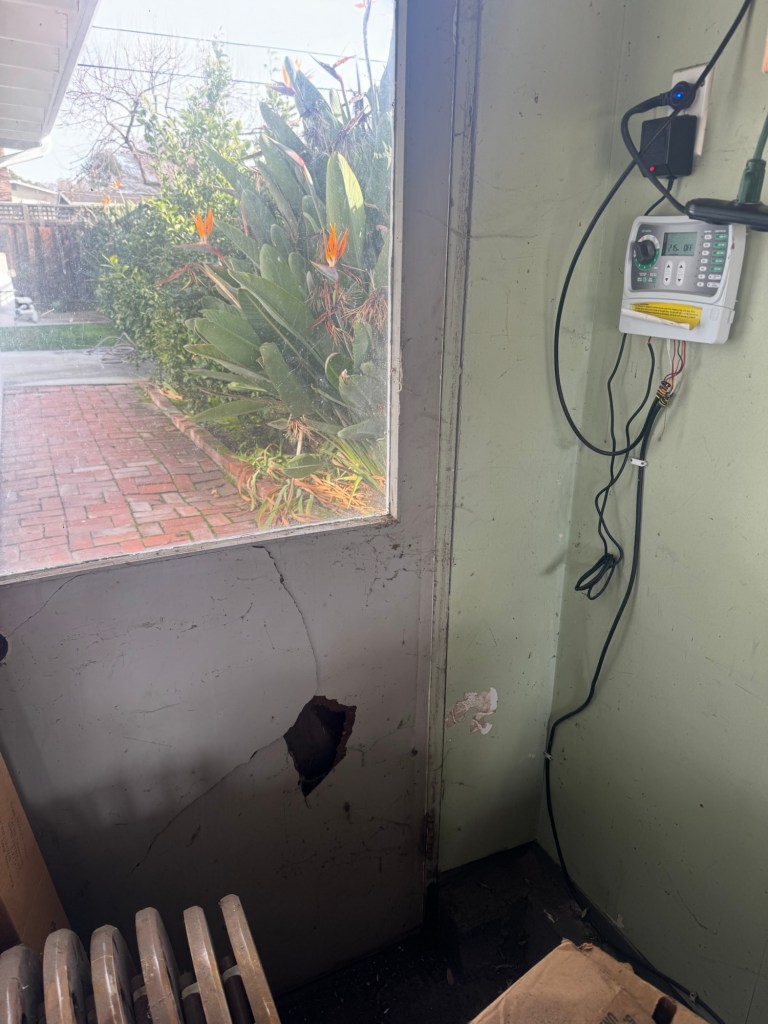
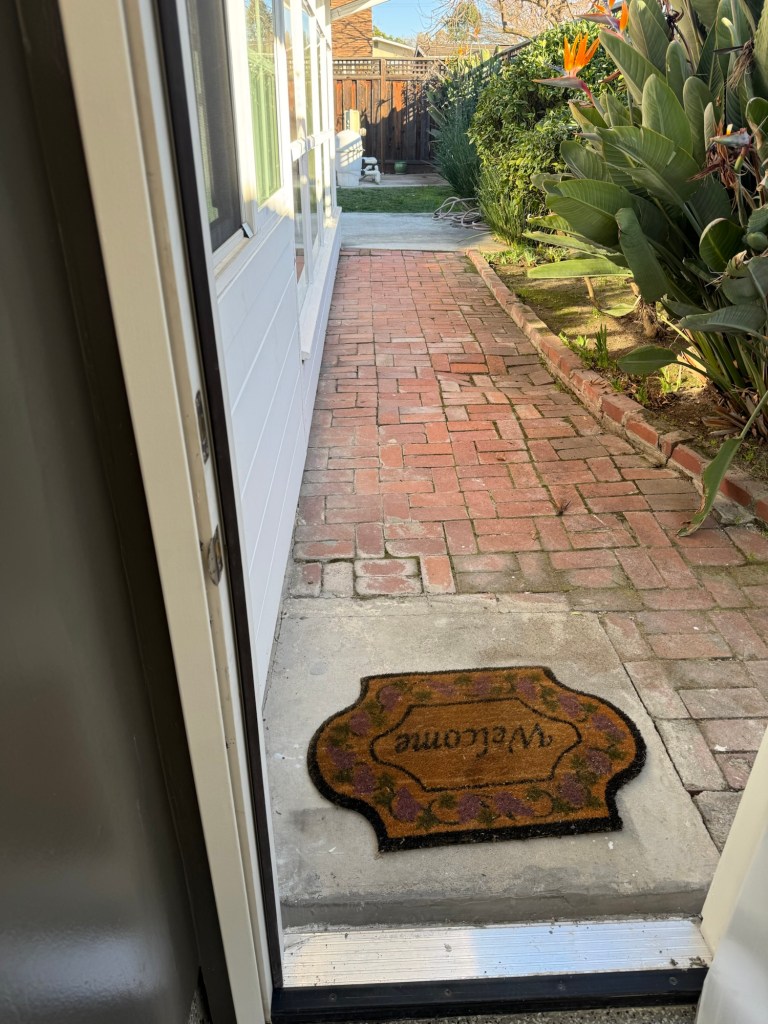
Outside door
The original garage had a door to the backyard pathway which we never used. There was no door knob, just a latch which we padlocked. There was a giant hole through part of the door, and it was constantly dusty and gross in that corner.
We replaced that door with a more substantial fire door, and I have to say it’s kind of nice to be able to get out of the house through it.

Slat walls
Many of my neighbors got slat walls installed in their remodeled garages, and I can see why. It’s easy to hang tools like brushes, brooms, rakes, leaf blowers, and ladders. And works well for smaller items like hammers, screwdrivers, and wrenches. I plan to use half of the slat wall for my gardening tools and the other half to hold my bike helmet, shoes, and other exercise equipment.
We’re only adding a single 8 x 4 foot slat wall, but we can always expand in the future. I’ve also been looking at 3D printing my own honeycomb storage wall, but that will be a project for another day.
Paint the walls
The garage will be performing double-duty as a car park and a video studio. I chose Sherman Williams Thunder Gray for the back wall and Eider White for the ceiling and other walls. I plan to use color LED lights and gels to give the gray wall a nice accent color for my videos.

One thing to keep in mind is to use matte paint. I did not specify which paint color to use, and the contractors painted the walls with semi-gloss paint. If I find the reflections to be too objectionable, I might bring in my green screen from the office or re-paint the back wall with the matte version of Thunder Gray.
What’s next?
At the time of this blog post’s publishing, we have yet to get the slat walls installed, which is why we haven’t moved much stuff back into the garage.
I’m still researching what kind of workbench I want to have for my 3D printer. Should I get a workbench on wheels or one just leveling feet (since the garage may not be perfectly level)? Should I get an additional workbench on wheels that I’ll use as my computing station and video demonstration table? Temporarily, I’m using a folding table while I wait to figure these things out.
For storage, I’m looking to get some dustproof and waterproof storage containers to replace the many cardboard boxes we have.

Conclusion
Overall, I’m happy with the work that Renato and his crew from GarageMonkey did. Some more neighbors along the street have inquired about our garage, and I passed along his information to them. If you live in the Bay Area and are looking to update your garage, give them a call and tell them Adam referred you!

Corrections and Updates
- February 10, 2025: Upon further review, I don’t think the map on the wall of the garage depicted ham radio stations. Rather, it was a sectional aeronautical chart of the continental United States. I have updated the blog post to reflect this.
Products links
- Emporia Level 2 EV charger
- Gorilla Grip drawer and shelf liners
- Liftmaster 98022 side-mounted garage door opener
- Meross Smart Garage Door Opener Remote
- Rad Cycle Mighty Rack Two Bike Floor Stand
- 2’7” by 21’ artificial grass runner from Ottomanson
- 6×8 foot recycled polyester rug from AtHome
Disclaimer: This post may contain affiliate links. If you make a purchase through one of these links, I may earn a small commission at no additional cost to you. Thank you for supporting my blog!


Leave a reply to Re-painting the front and installing a handleset – tow.com Cancel reply